
Qualtrics
Overview
Qualtrics setup has two separate decisions: which OAuth client can read the data, and which surveys Enterpret should import. A successful sign-in completes the first part. You still need to add the surveys.
Qualtrics and Delighted are separate products. Delighted was owned by Qualtrics and is no longer available. Its final sunset was June 30, 2026, and customer access ended July 1, 2026. This guide connects Qualtrics surveys; it does not reconnect a Delighted account. See Qualtrics’ Delighted availability notice.
First, prepare the OAuth client with your Qualtrics administrator
Ask for these three values:
Value | Why it matters |
|---|---|
Client ID | Identifies the OAuth application |
Client Secret | Must belong to that same client |
Data Center ID | Routes authorization and API requests to the correct Qualtrics environment |
Use an Authorization Code client for this connection. If the grant-type selector is unavailable, involve your Qualtrics brand administrator rather than accepting a Client Credentials client. Qualtrics explains the distinction in its OAuth setup guide.
Locate the Data Center ID
Sign in to the intended Qualtrics account.
Open the profile/user-settings menu at the top right and select Account Settings.
Open Qualtrics IDs. In the redesigned Account Settings, choose Switch to older version if the tab is missing. Record the Data Center ID if it is listed.
Alternatively, find the ID in your signed-in Qualtrics address. If it contains .iad1.qualtrics.com, enter
iad1. Use the data center that matches your client.
Create the OAuth client
- In Account Settings, open OAuth Client Manager. Some layouts place it under Qualtrics IDs.
- Click Create Client. Enter a name such as Enterpret Integration and an optional contact email.
Configure:
Grant type: Authorization Code.
Read scopes:
read:surveysandread:survey_responses.Redirect URL: https://dashboard.enterpret.com/settings/integrations.
Click Create Client. Save the Client ID and Client Secret securely. Copy the full secret before closing the creation dialog. If you missed it, create a replacement client and use its matching ID and secret. See Qualtrics’ base URL and ID guidance.
Confirm with your Qualtrics administrator that the authorizing user has API Access and can read the intended surveys and responses.
Enter the client details in Enterpret
Sign in to Enterpret with permission to add integrations.
Click your name at the bottom of Enterpret’s sidebar, then select Integrations.
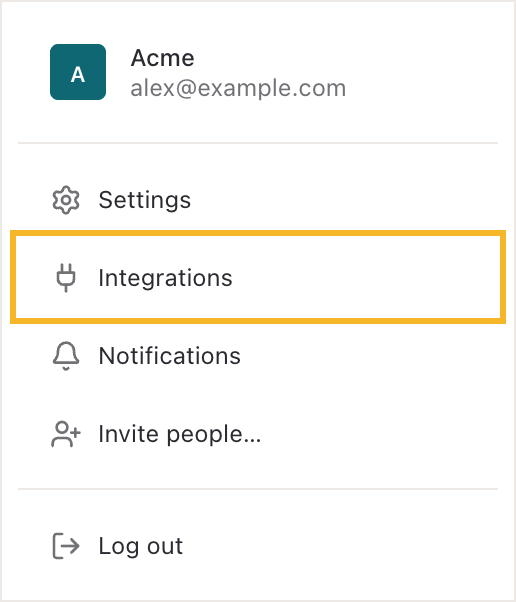
Open the account menu from your name, then choose Integrations.
Click + New Integration. Search for Qualtrics and click Continue on its card.
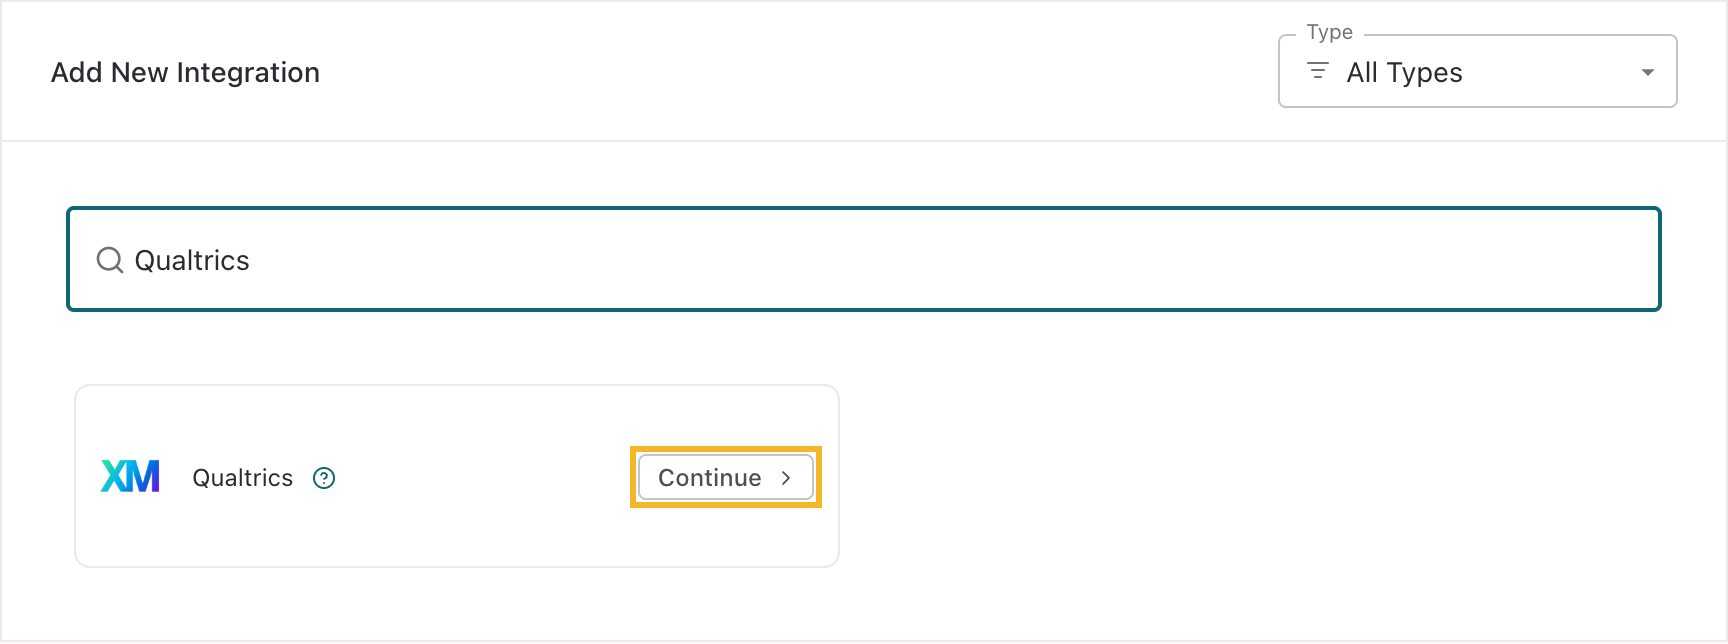
Search for Qualtrics, then click the highlighted Continue button.
Choose Feedback Integration. If you already filtered the catalog to Feedback, its card may show Connect instead of Continue; use that action.
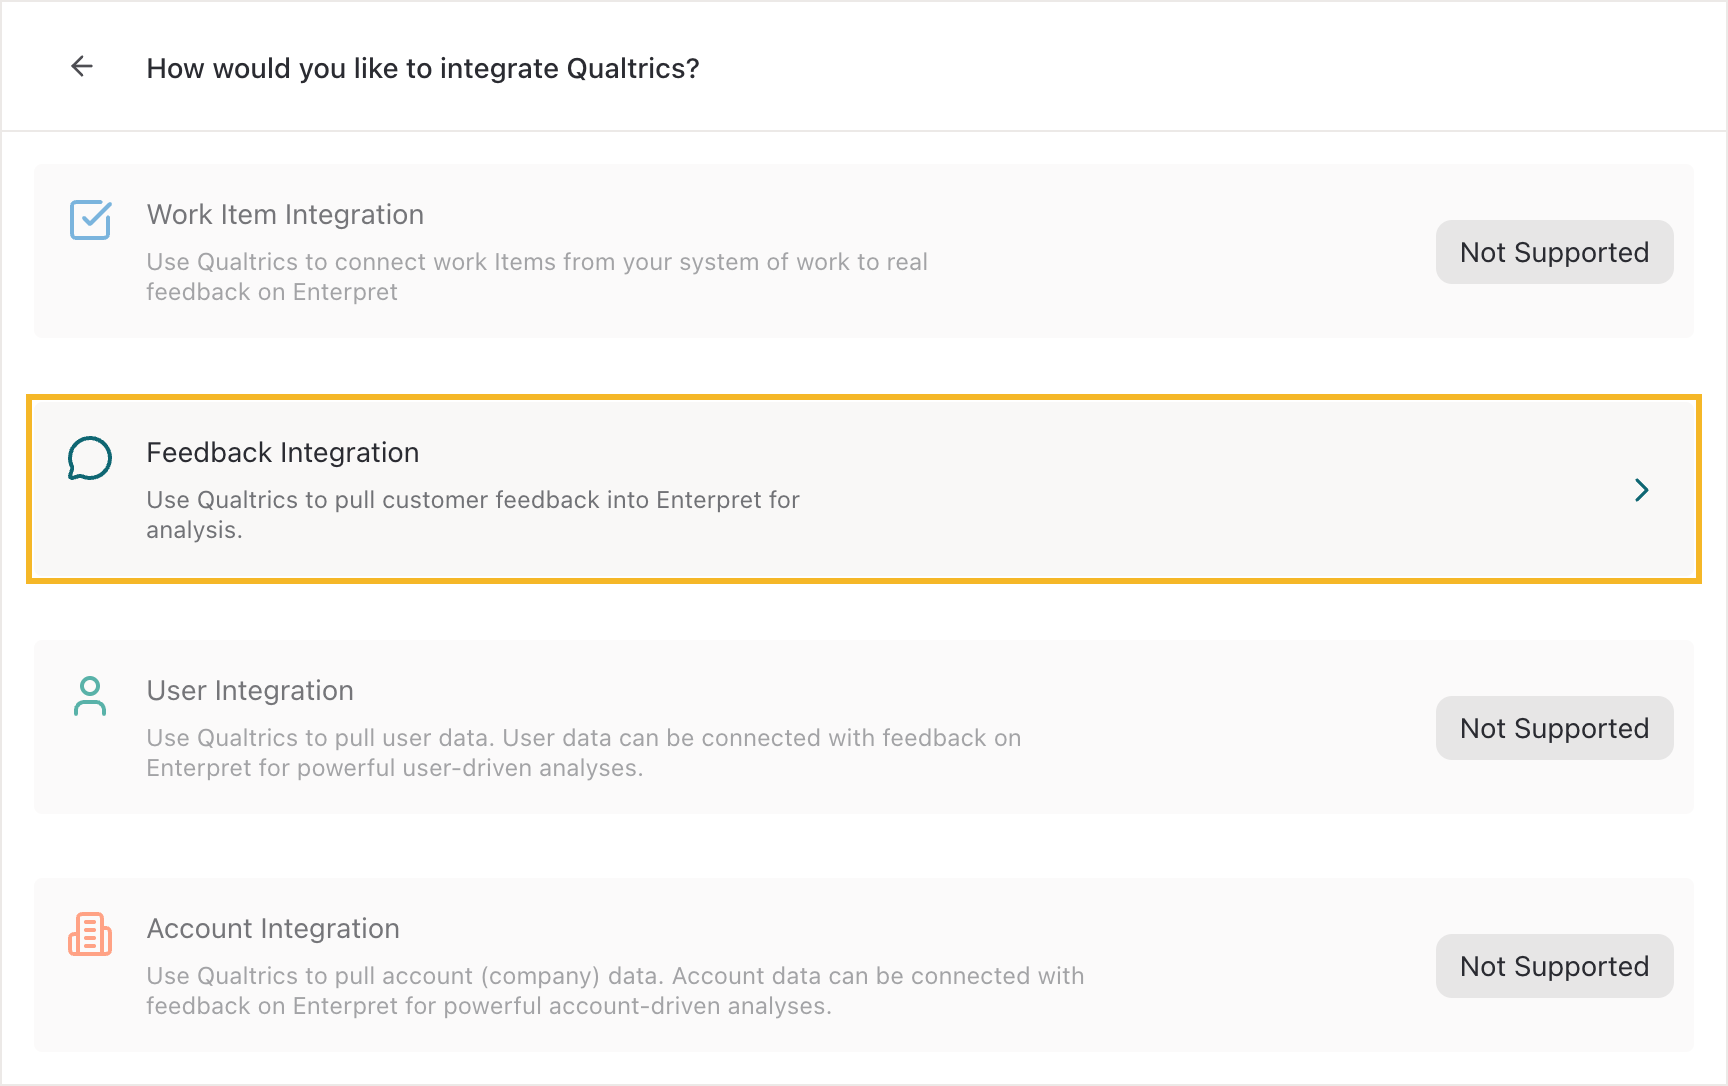
Choose Feedback Integration to bring Qualtrics feedback into Enterpret.
Enter Qualtrics Client ID, Qualtrics Client Secret, and Qualtrics Data Center ID.
Click Integrate, sign in to the intended Qualtrics account, and approve access.
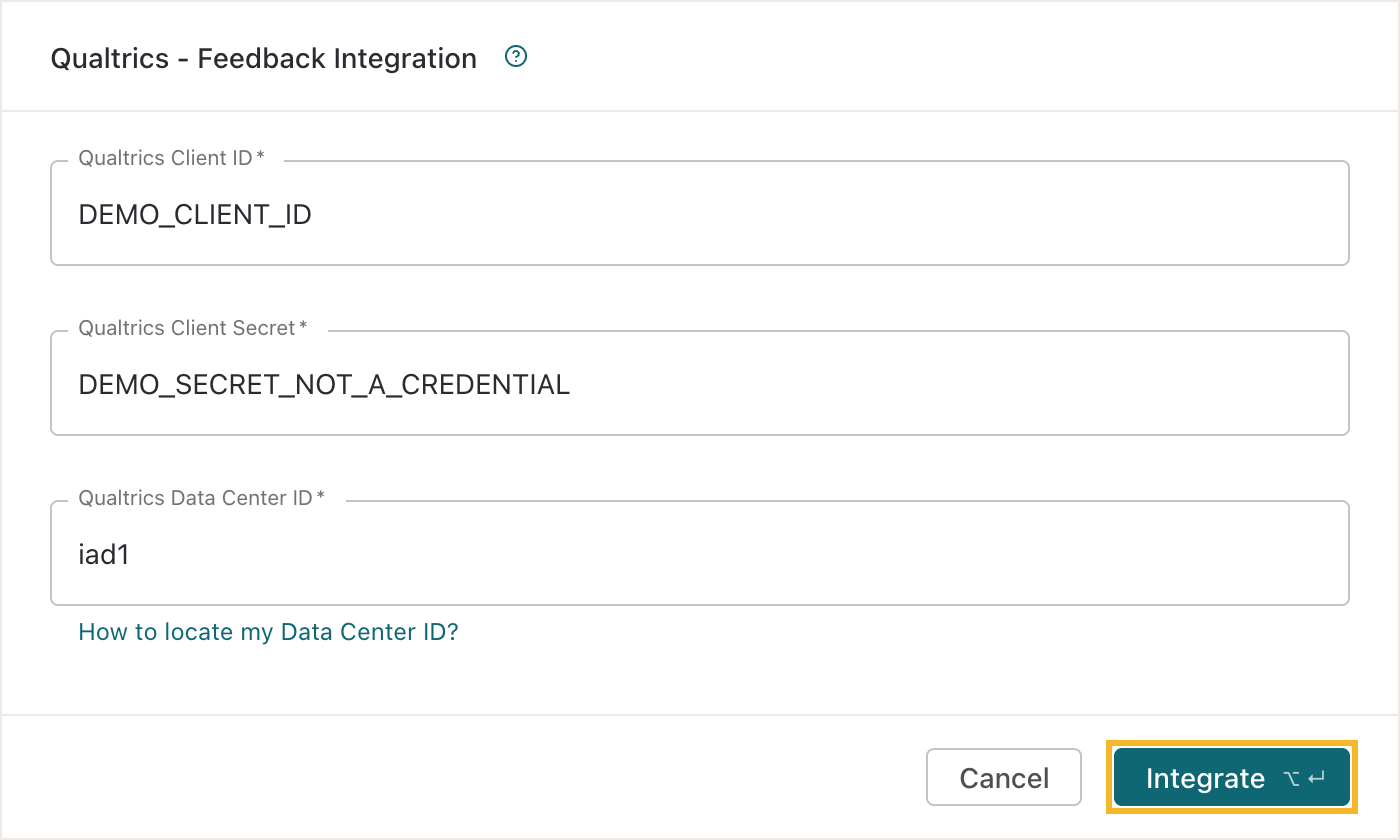
Enter the client details and a Data Center ID such as iad1, then click Integrate to begin authorization. Demo values shown.
Choose the surveys you actually want to analyze
After authorization, use Integrate a Qualtrics Survey:
Check Select Workspace.
Open Select Qualtrics Survey and choose one survey.
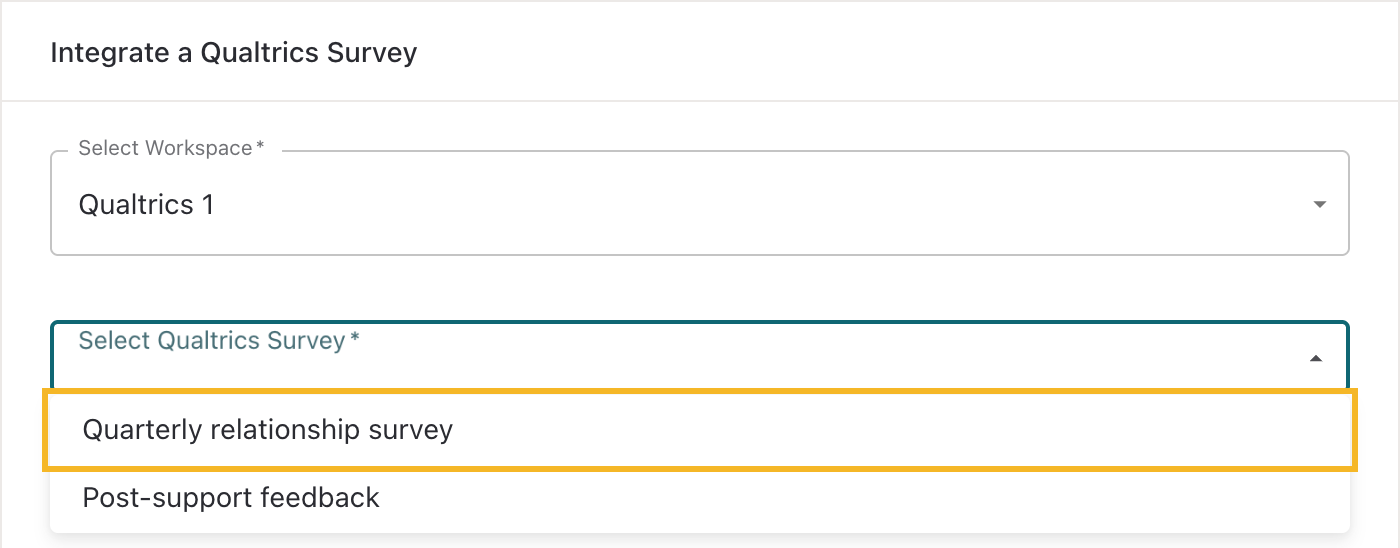
Choose a survey from the authorized account. Surveys already added are filtered out of this list.
Describe its respondents, subject, and analysis goal in Describe the type of feedback being integrated. Keep the description within 500 characters and complete its checks.
Click Integrate.
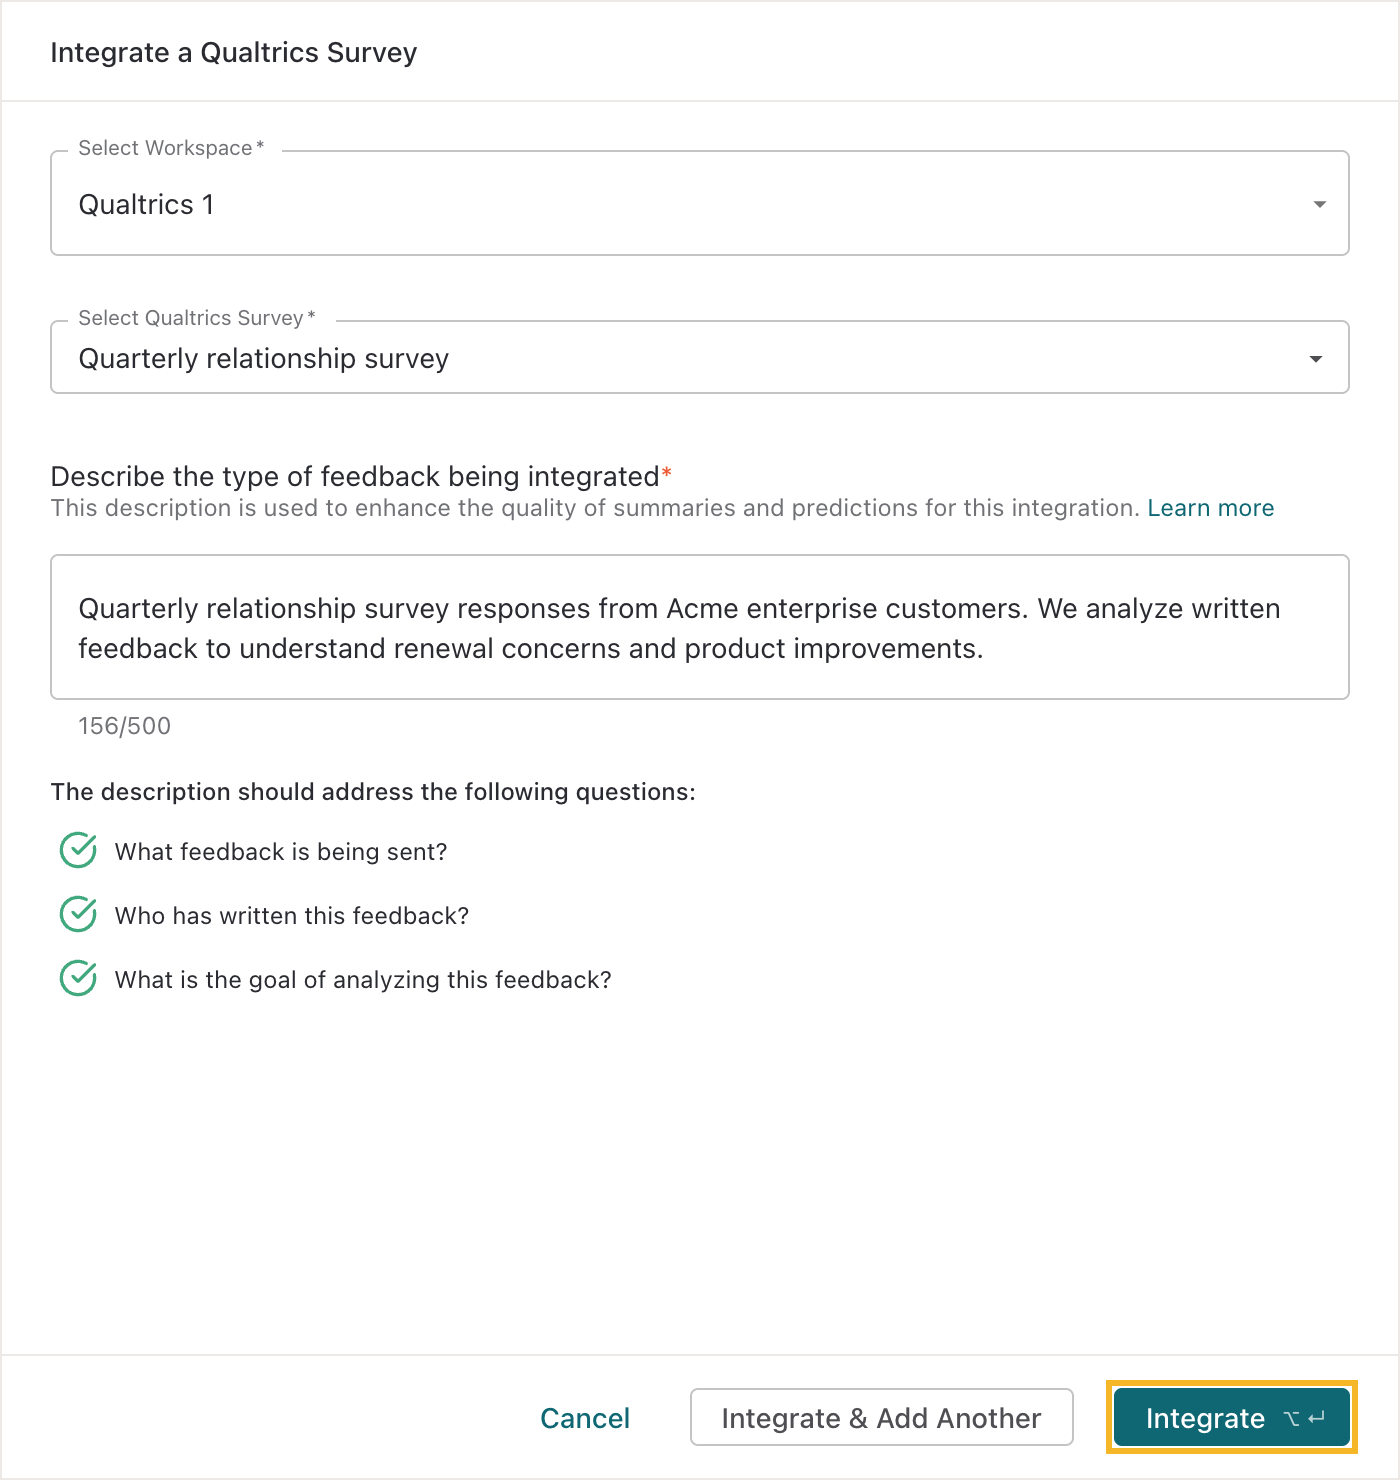
Review the selected survey and its own feedback description, then click Integrate.
If a survey is missing, check the saved list, selected connection, and authorizing user’s access.
Understand the data you are validating
Enterpret retrieves survey responses through Qualtrics’ export workflow, then turns supported questions into feedback and metadata. This is different from downloading a QSF survey definition: the integration needs the responses.
Written answers provide analysis content. Structured choices and ratings provide context and metadata; whether choice-only responses also supply analyzed content depends on your organization’s configuration. The feedback record date comes from Qualtrics’ recorded date.
Qualtrics documents the response export workflow. For your first check:
Choose a response with written feedback and a known recorded date.
Find the matching Enterpret record after fetching and processing.
Compare the written answer and a structured field you need for analysis.
Test specialized questions separately if matrix, file-upload, or choice-only responses are central to the survey.
Ask Support to confirm the import history window and sync schedule. Neither authorizing the account nor adding a survey confirms that every historical response has finished processing.
Manage surveys after setup
Add another survey or account
In Integrations → Qualtrics, click + Add New and choose the intended workspace before opening the survey drawer. Select the next survey and give it its own description. Already connected surveys are hidden from the picker. Choose Add Workspace from the workspace menu to authorize another account. Save each survey with Integrate and verify it before adding the next.
Edit the feedback description
Find the survey in the connected list and click Edit beside it. Update Describe the type of feedback being integrated, complete the displayed checks, and click Save Changes. Keep the description within 500 characters and explain the feedback, its authors, and your analysis goal. This edits the description for that survey; it does not change the selected survey, account, or OAuth permissions. See Writing integration descriptions.
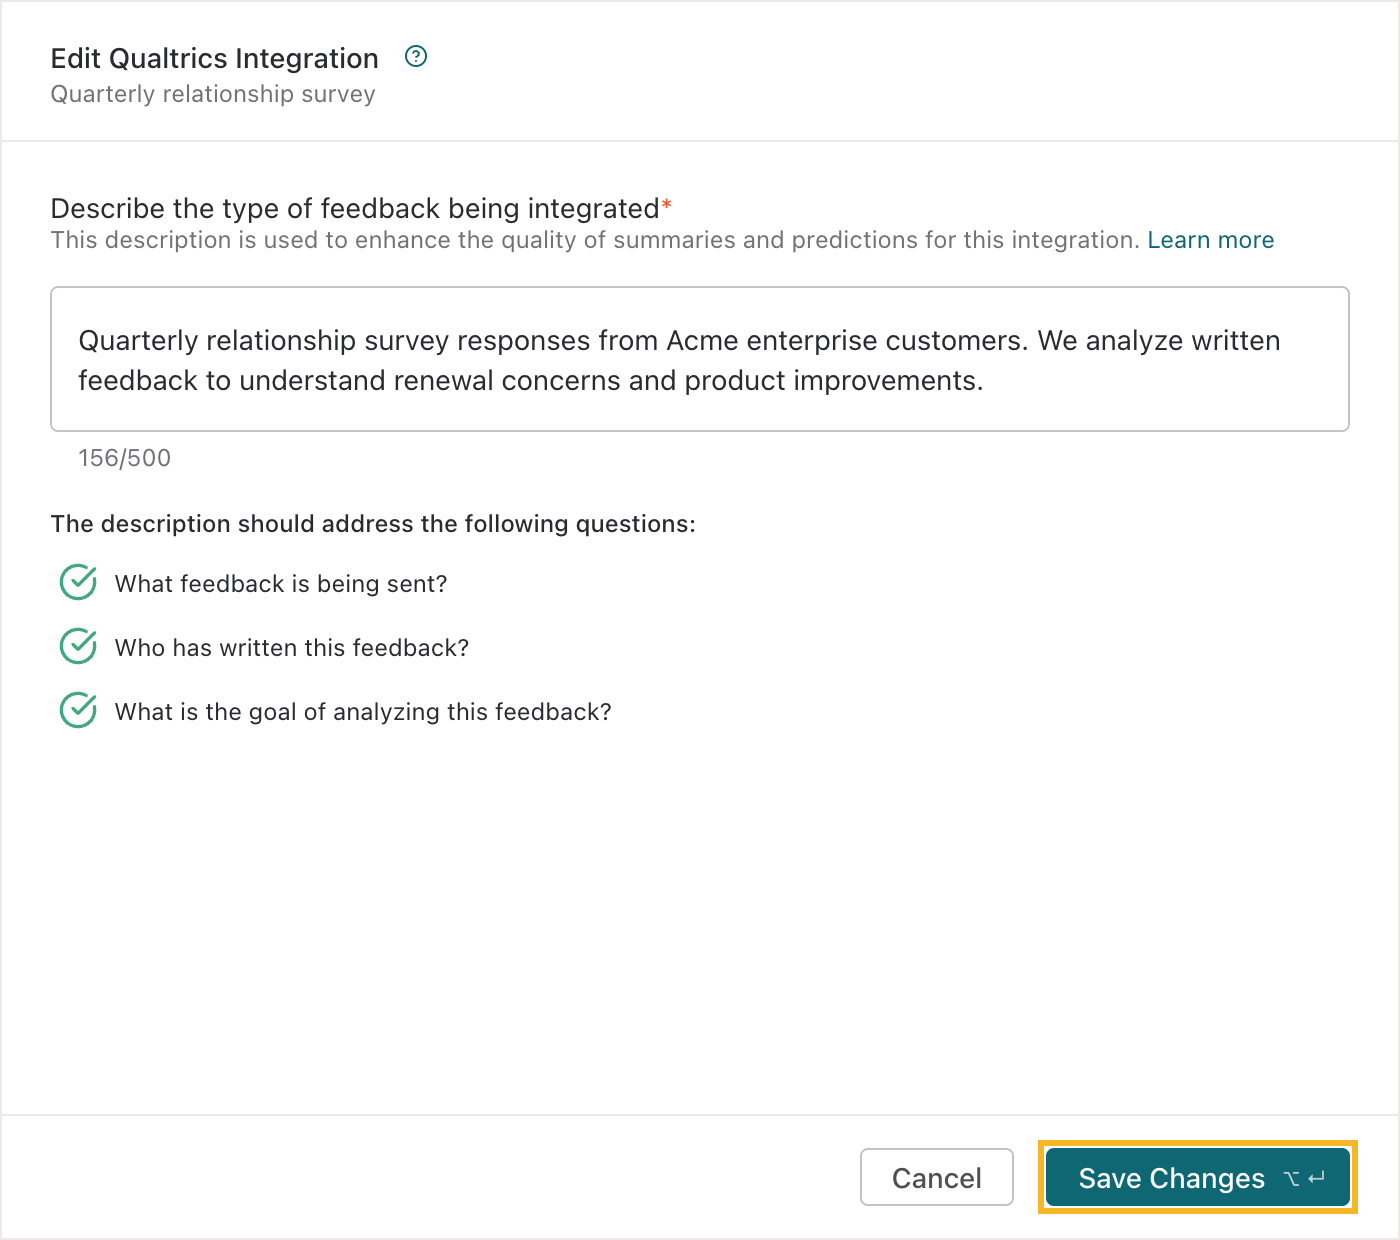
Edit the description, then click Save Changes. Example description shown.
Inspect status, imported records, and metadata
Open the source from Integrations. Check status and timestamps on the connected workspace row. Check a known submission in Feed or choose View all Records from the workspace menu, if available.
Use Unified fields to compare fields across sources. Ask Support if a field or an expected record is missing.
Remove one survey or stop a connection
To stop a single survey, open its row’s ⋮ menu → Remove Integration → Remove. Existing imported feedback stays available. Other selected surveys remain connected.
Contact Support if you need to stop imports for the whole workspace while retaining existing feedback.
Delete Workspace, when available, permanently removes the connection and its imported feedback. Check dependent analyses, metrics, dashboards, and reports before confirming. Contact Support if the action is unavailable.
Renew access to the existing Qualtrics account
Use Reauthorize on the existing connection where available and complete authorization with the intended Qualtrics user. If you need a new client, create it with the same required grant, scopes, and redirect URI described above, save its newly displayed credentials securely, and use the matching client details in the reauthorization flow. Confirm the Data Center ID and API Access permission. After saving, verify the selected surveys, connection status, and a known response. Contact Support if reauthorization is unavailable or fails; do not send client secrets in the request.
Resolve the problem at the right step
Before Qualtrics opens: fill all three credential fields. If the Data Center ID is rejected, remove the URL, slashes, or path and enter the ID alone.
At the authorization screen: check that the client uses Authorization Code, the redirect URL matches exactly, the client credentials belong together, and the data center is correct.
After authorization: if surveys or responses are absent, check the authorized user’s access and saved survey selection. For an ongoing data gap, send Support the survey ID, response ID, recorded date, and expected question.
If access expires: reauthorize the existing connection where available. Do not send the Client Secret in a support message.
Analyze this feedback with Enterpret Agent
Once you verify the import, use Enterpret Agent in the app or in Slack to explore the feedback. If you use an external agent, connect it through the Enterpret MCP Server.
Review the last 30 days of Qualtrics survey responses. Summarize recurring themes in written answers and cite representative responses.