
View & Manage Metadata
What is Feedback Metadata?
Feedback metadata is everything captured alongside a feedback record that is not the feedback text itself, like app version, NPS score, plan type, or the Slack channel a message came from. It is how you slice and filter your analysis so you can see, for example, what enterprise customers are saying versus what free-trial users flag. Each source brings its own set of metadata, and this page is where you control how those fields appear, filter, and group inside Enterpret.
Examples by source:
App Store/Play Store: score, app version
Survey Monkey: Survey title, score rating
Intercom: User plan type, custom tags
Slack/Discord: Channel where message was posted
Where is Metadata on a Feedback Record?
Available metadata is shown with each record. Starred fields are shown upfront; open the record’s metadata view for the remaining fields.
Open a feedback record and select its Metadata tab, or the metadata control offered in that record view.
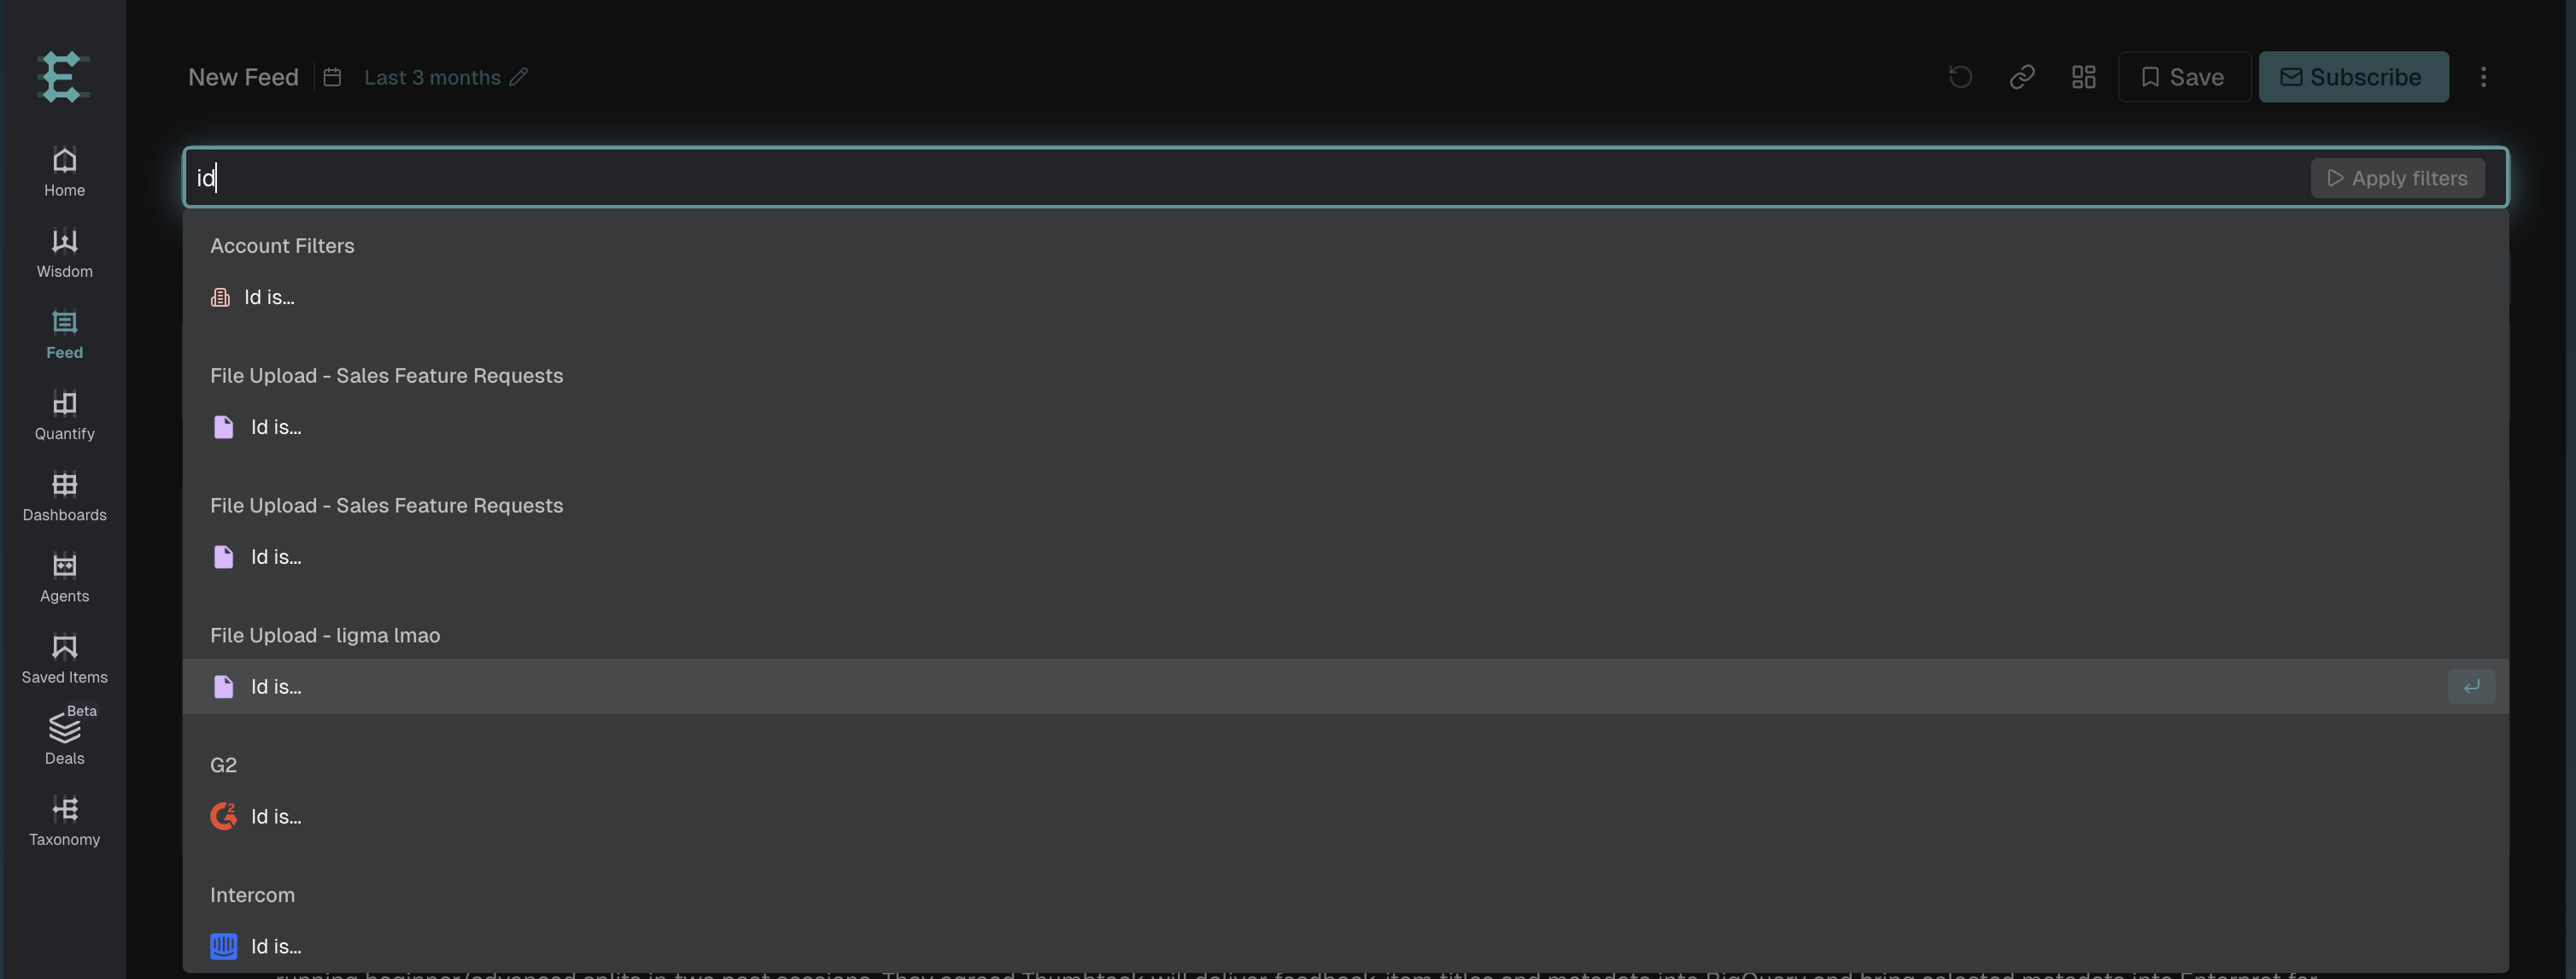
Filter Query Through Metadata
Metadata helps filter feedback during analysis.
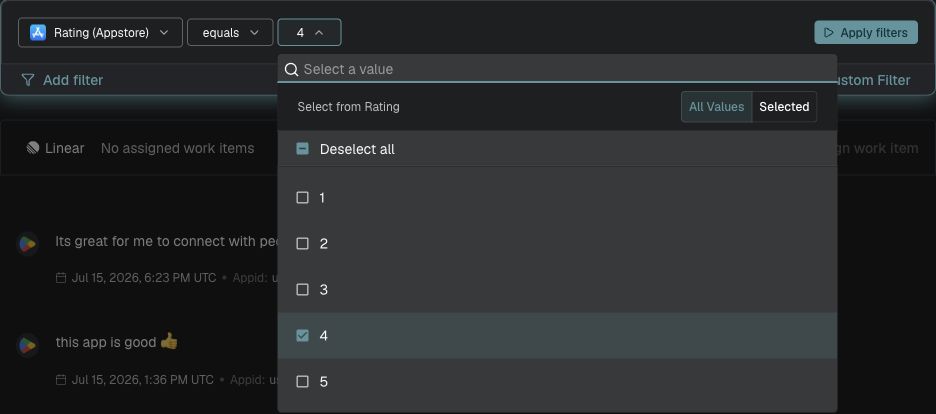
Example: To find feedback with App Store rating = 4, select Rating (Appstore) in the Enterpret query builder, choose equals, select the checkbox for “4”, then click Apply filters.
Metadata in Agent
Workspace Owners and Admins can find feedback metadata fields by source or name and check their current settings in Enterpret Agent. Choose Ask Agent or open Agent → New session. Looking up fields does not require approval.
You can ask the Agent to change a field’s display name or description, hide or unhide it, or change whether it is important (starred), filterable, or groupable. You can mark up to two fields per source as important.
For example, ask “Which Zendesk fields are hidden? Unhide the Customer Tier field.” Specify the source if more than one has a field with that name.
When the Agent shows an approval card for a change, review it and select Allow Once, Allow Always, or Deny. Allow Always saves your permission for future uses of that action.
To combine fields from different feedback sources, see Unified Fields.
Viewing and Managing Feedback Metadata
Open an integration’s Manage Metadata section to inspect its fields. Editing requires metadata-management permission.
Navigate to Manage Metadata Page
Open the account menu at the bottom left of the dashboard.
Click Integrations from the panel.
Open the relevant integration and find its Manage Metadata section.
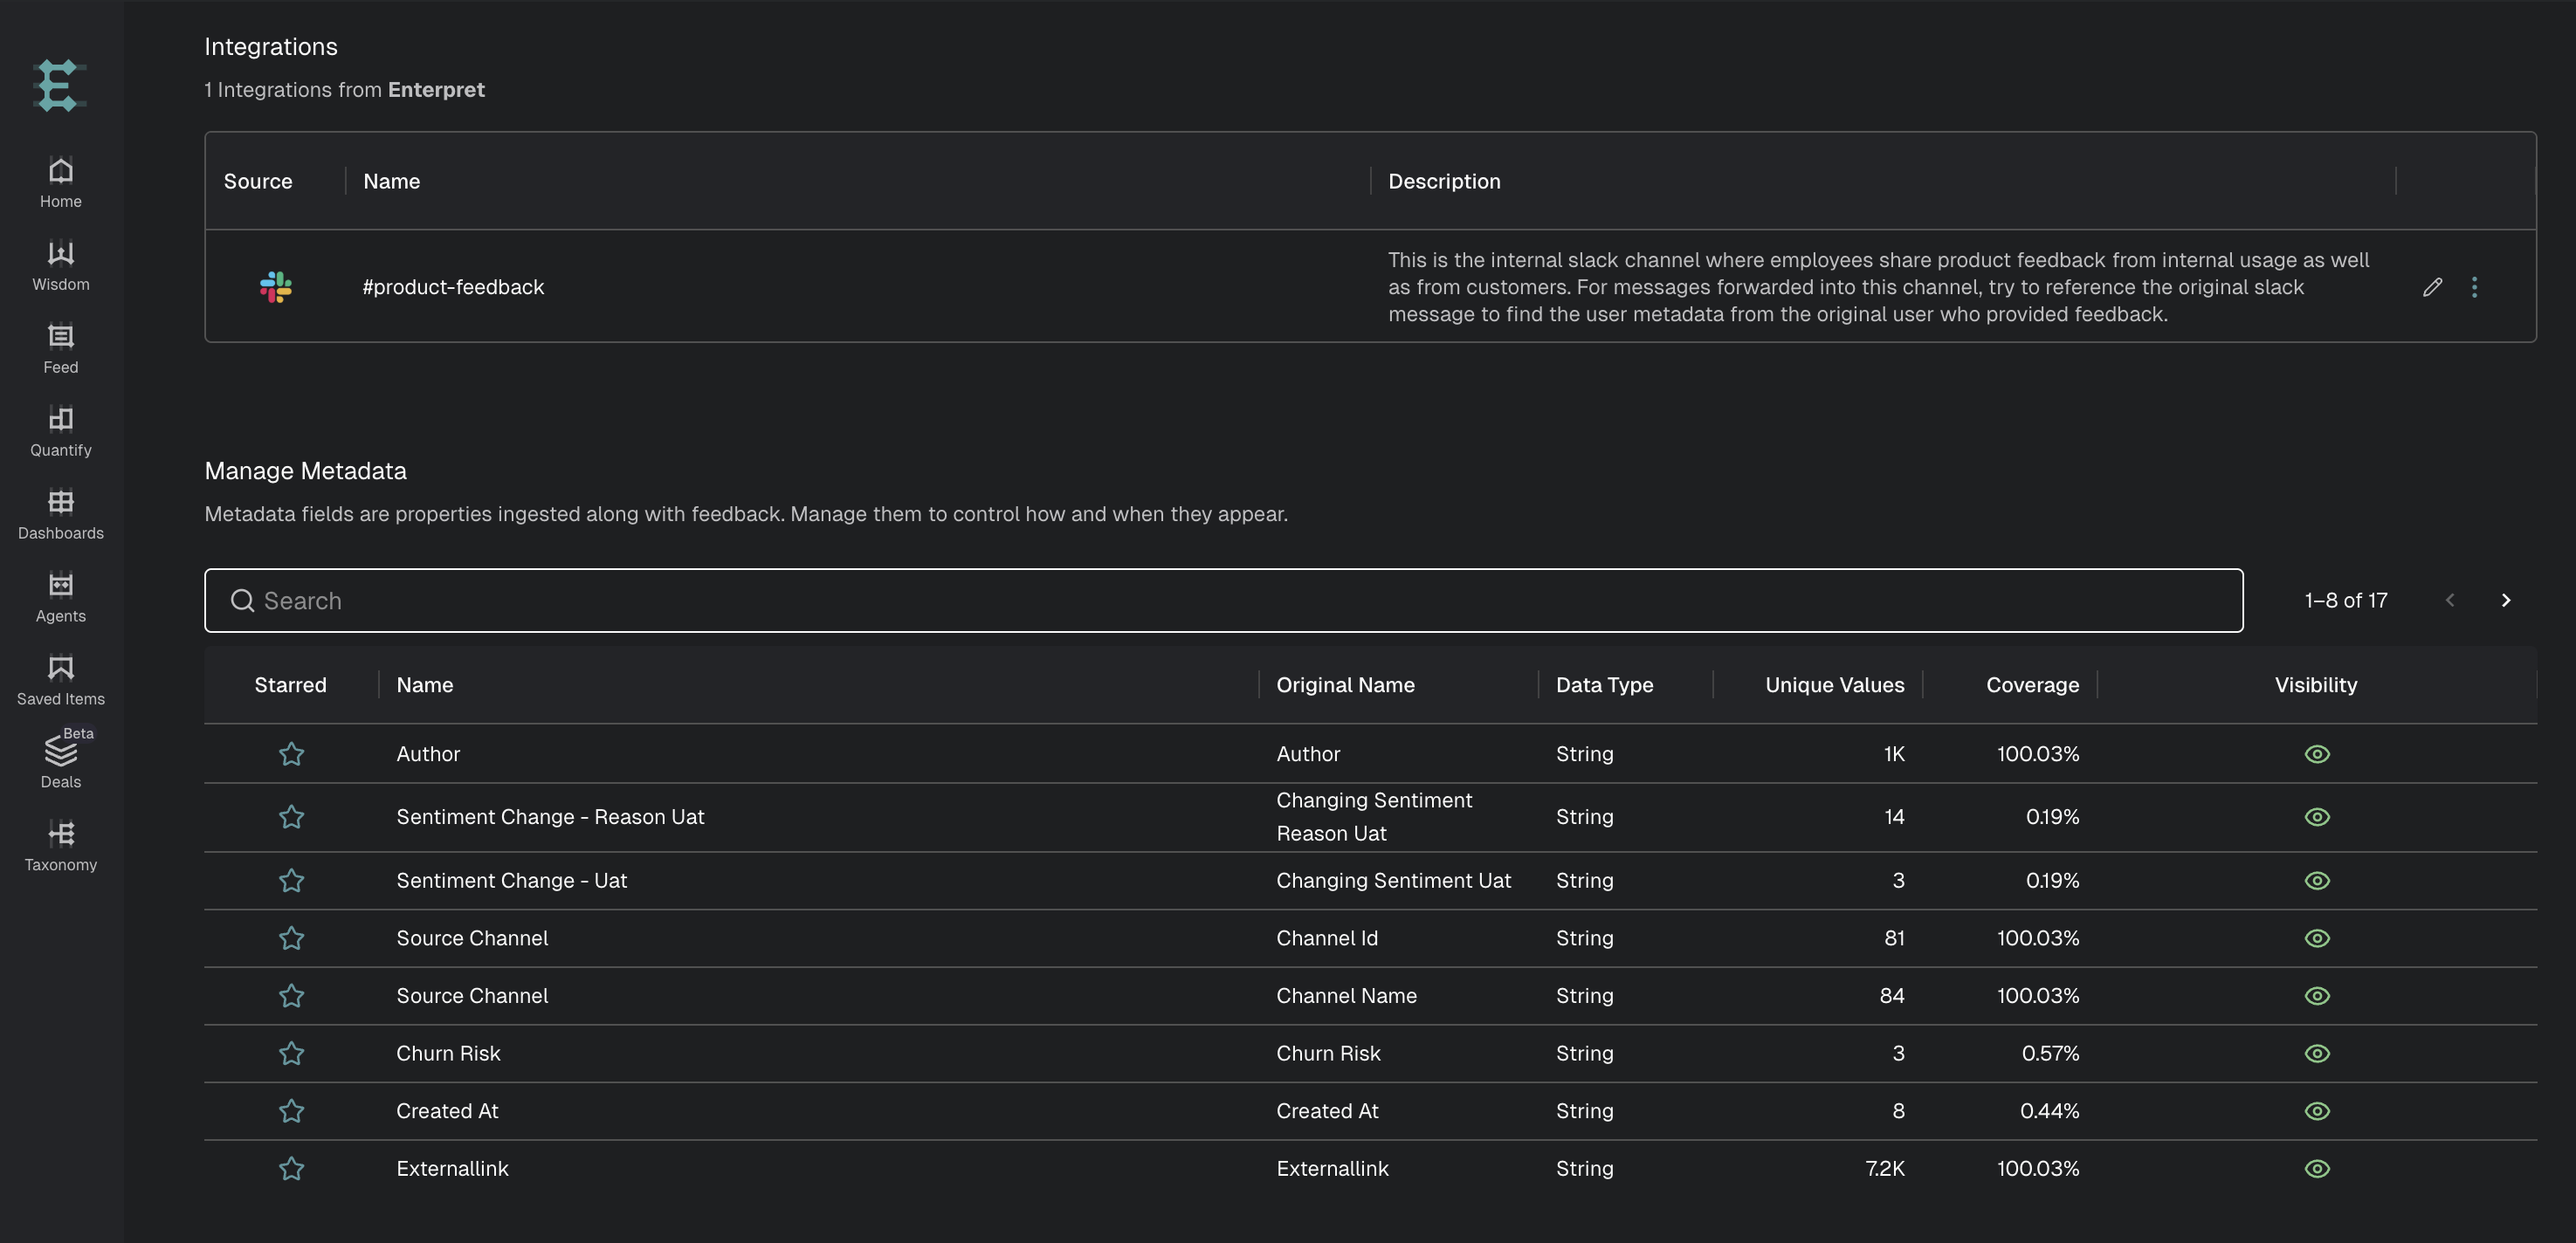
Note: Editing requires permission to manage metadata. If the controls are unavailable, ask your workspace administrator to check your role.
Details shown for each metadata field
Each metadata field shows the following information.
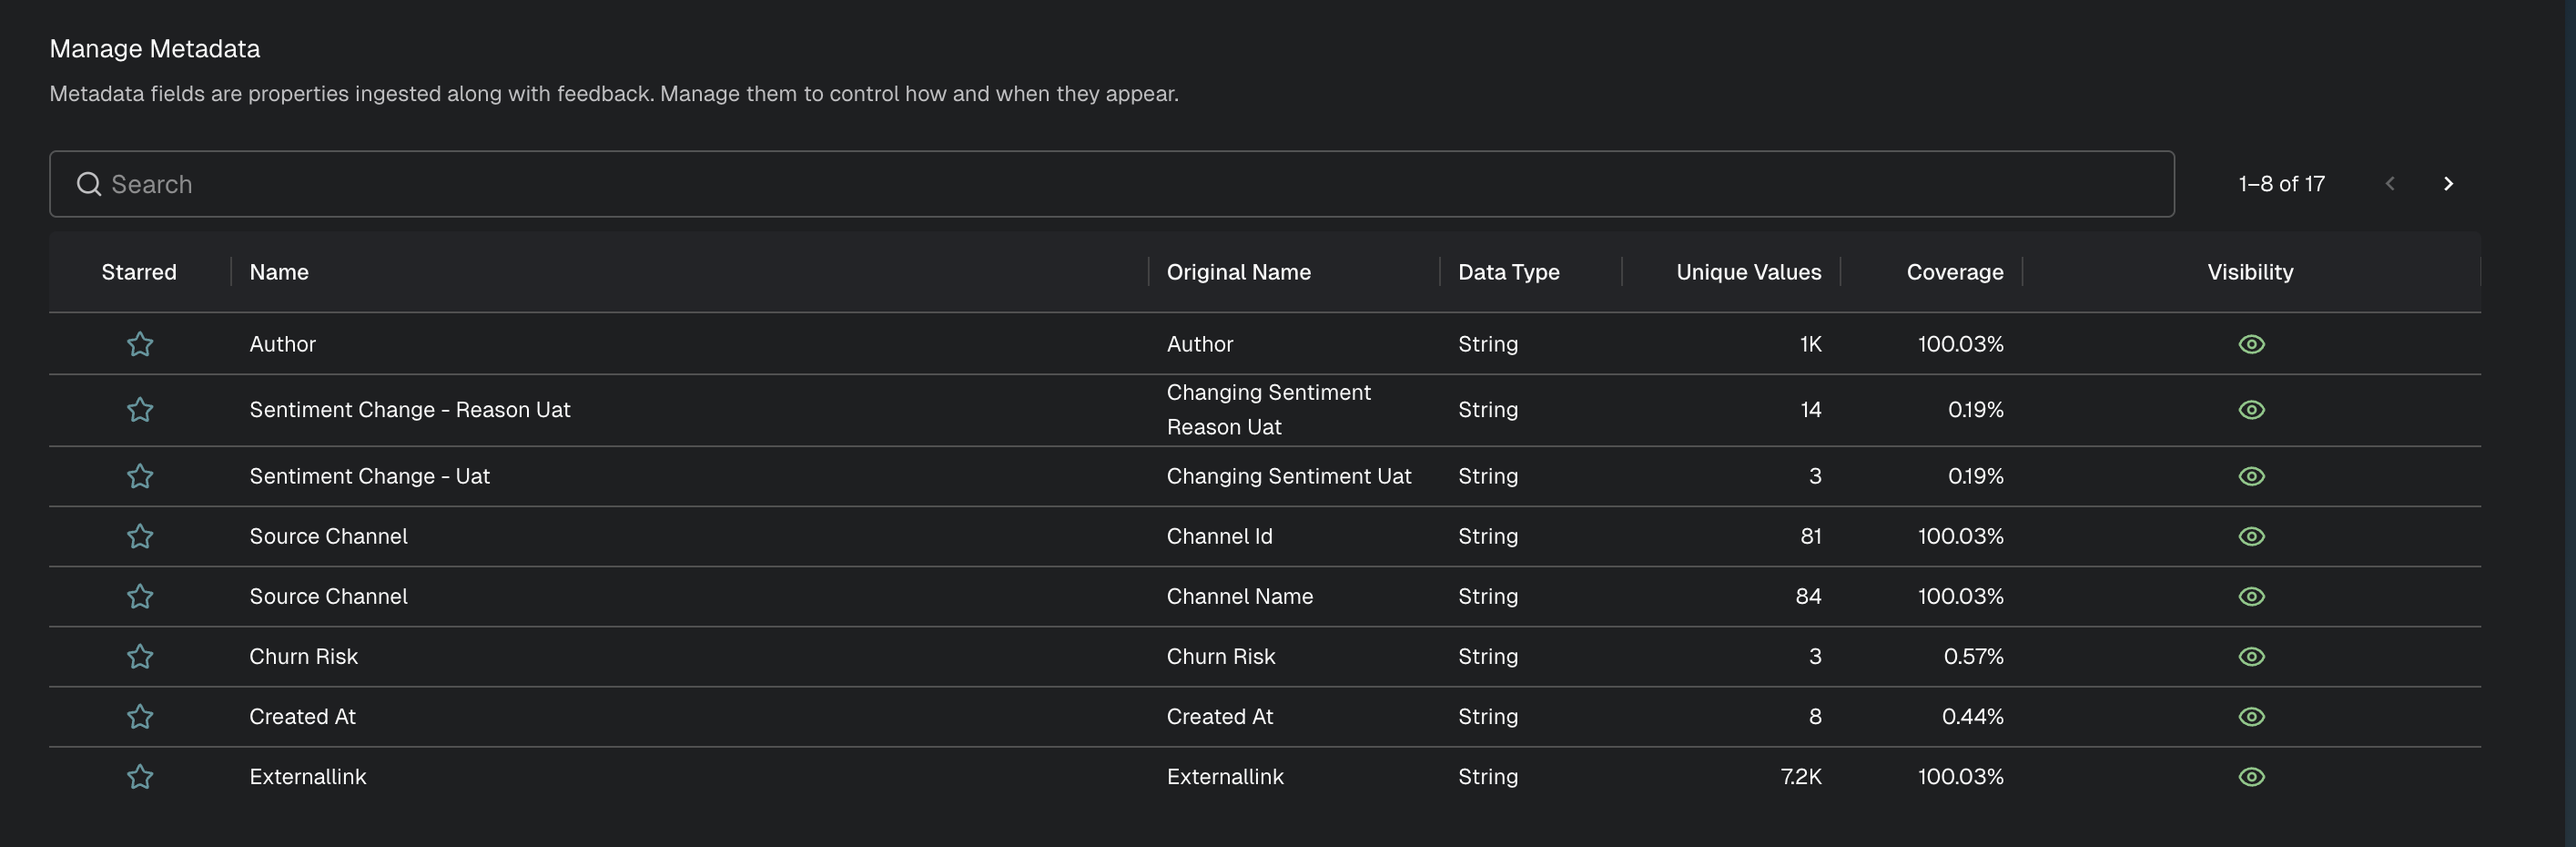
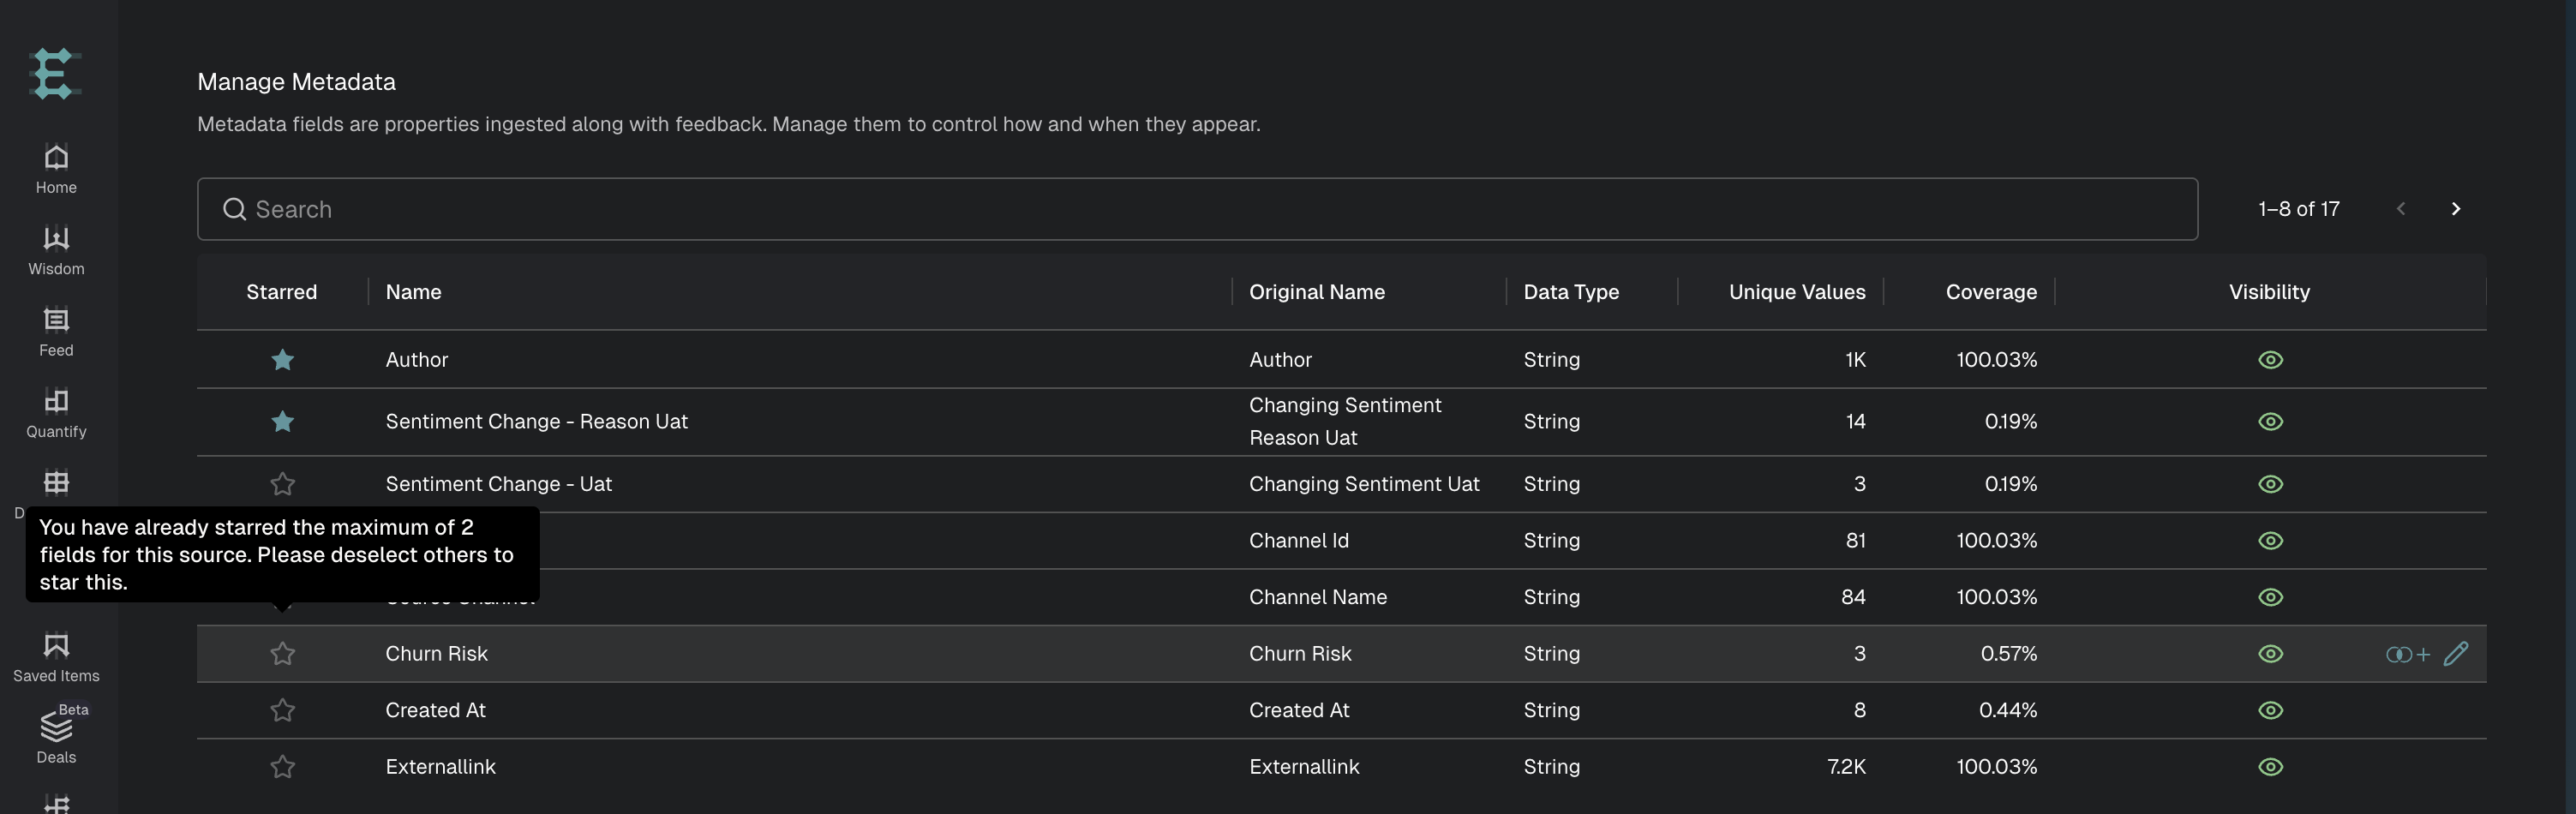
1. Starred
This is a one-click feature. On hovering over the star icon, a tooltip appears.
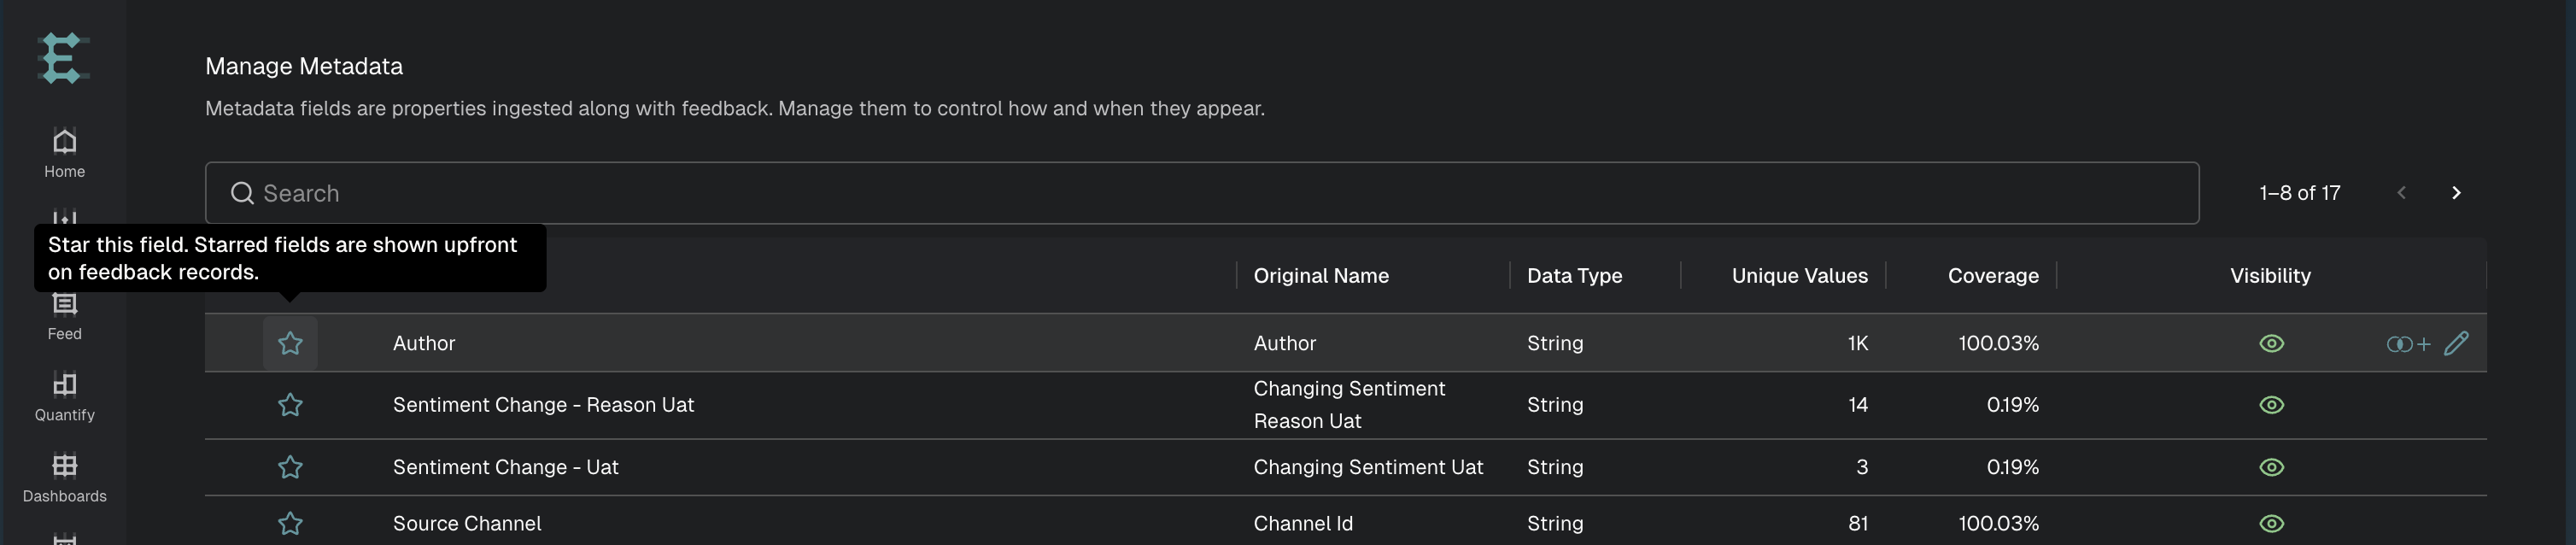
If the metadata field is starred, it shows upfront in feedback.
2. Name
The name of the metadata. This name is used everywhere the metadata is displayed.
3. Original Name
The original name of the metadata when it was ingested.
4. Data Type
The field’s data type, such as String, Number, Boolean, or Date Time.
5. Unique Values
The total number of unique values for this metadata.
6. Coverage
Percentage of feedback records from the source that have the populated metadata value.
7. Visibility
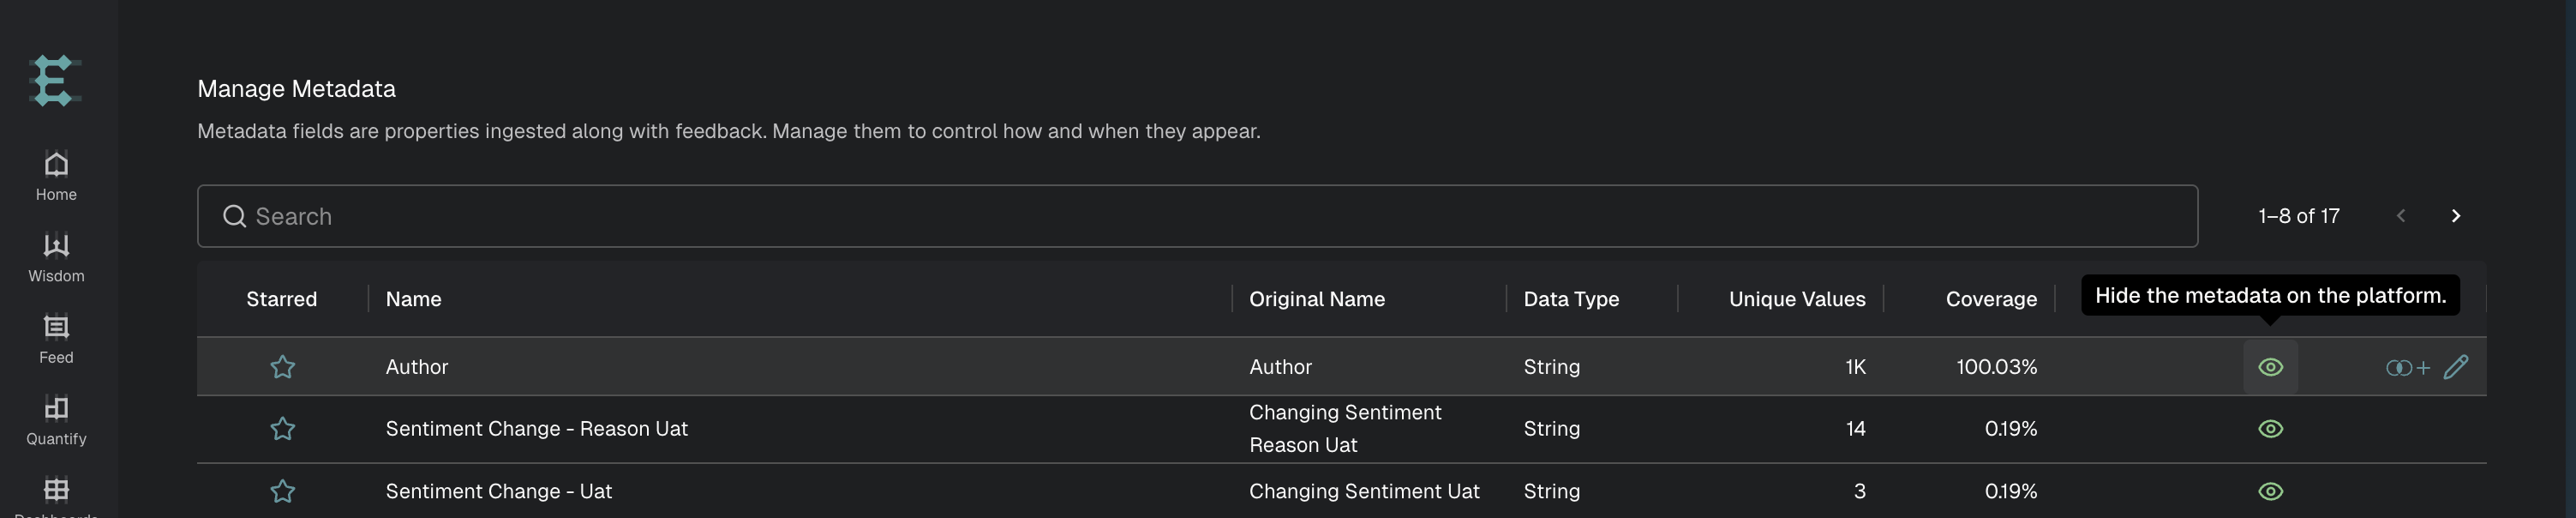
Visibility controls whether a metadata field appears in the standard interface for viewing, filtering, and grouping. Hiding a field does not remove its stored data and is not a field-level access restriction.
Editing Metadata
Hover over a row and an edit icon appears on the right side.
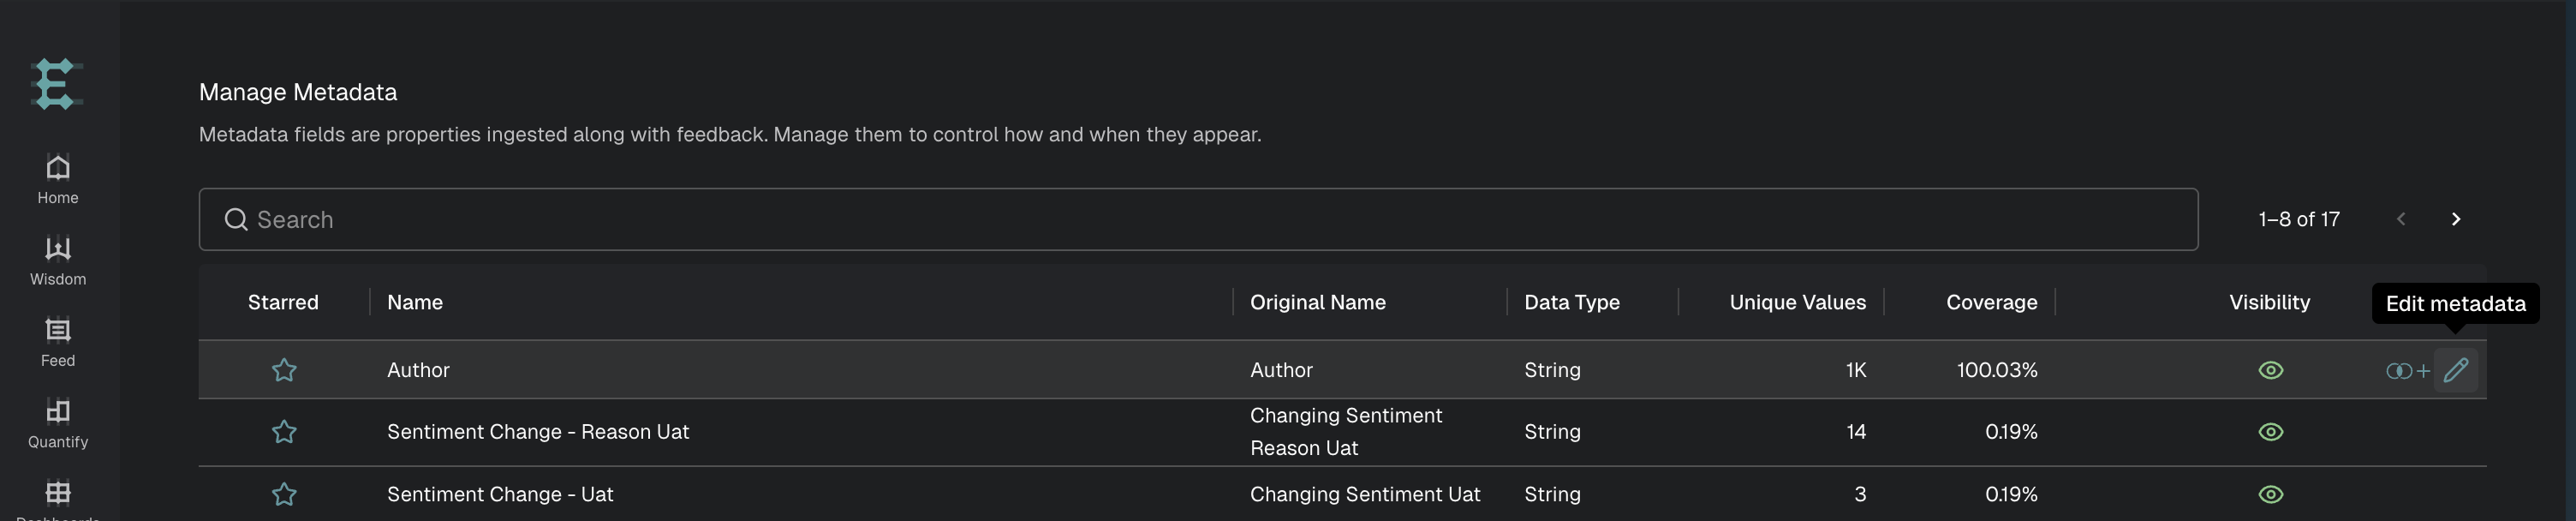
Click the edit icon to edit various properties of the metadata.
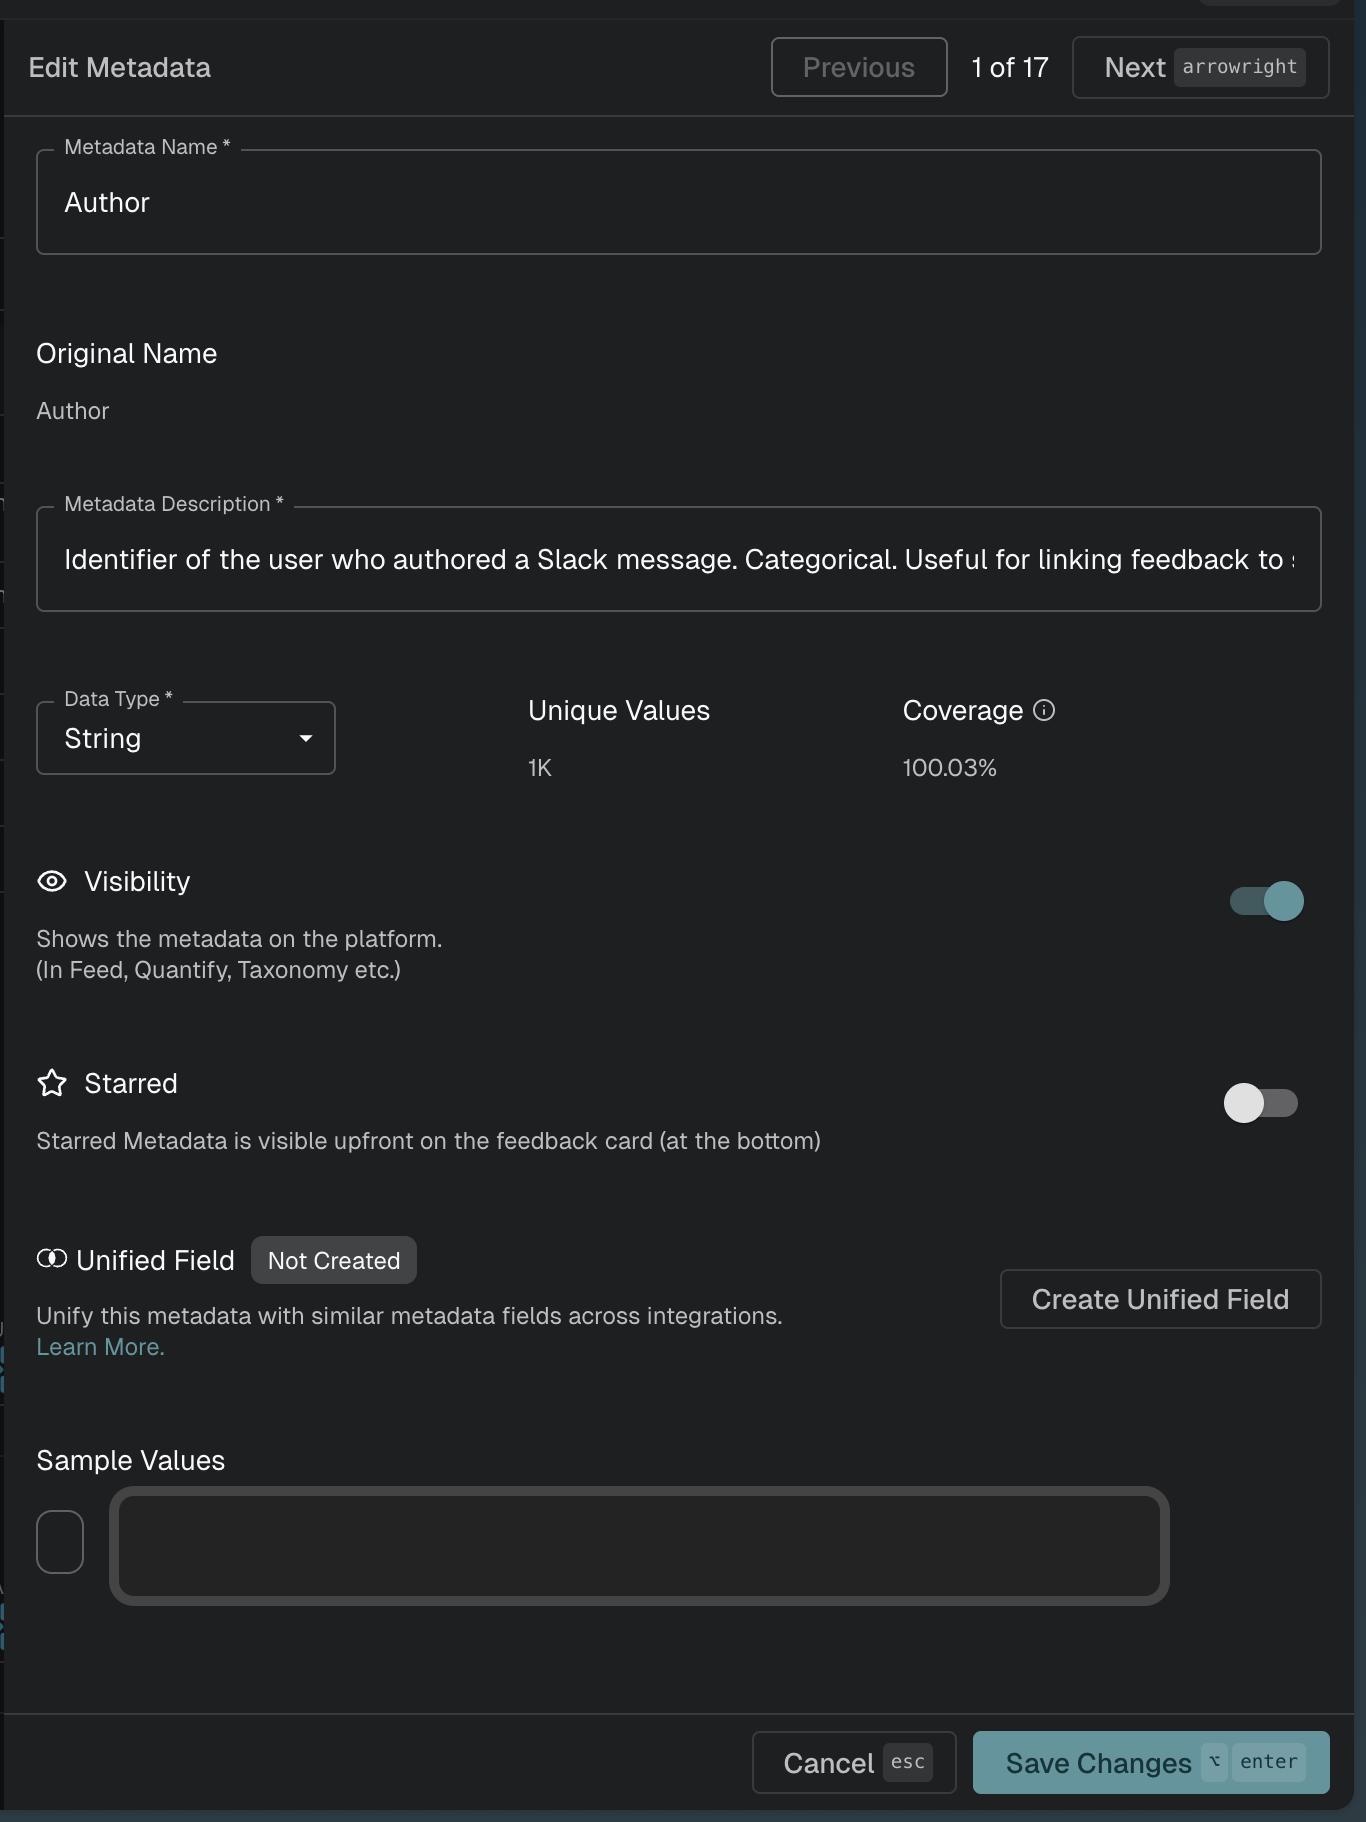
Note: You can star at most 2 metadata per source.
Set Metadata Fields as Source Link
For sources like FileUpload, Webhook, and Snowflake (where the original source link is unavailable), you can set one metadata field as the source link from the Integrations page.
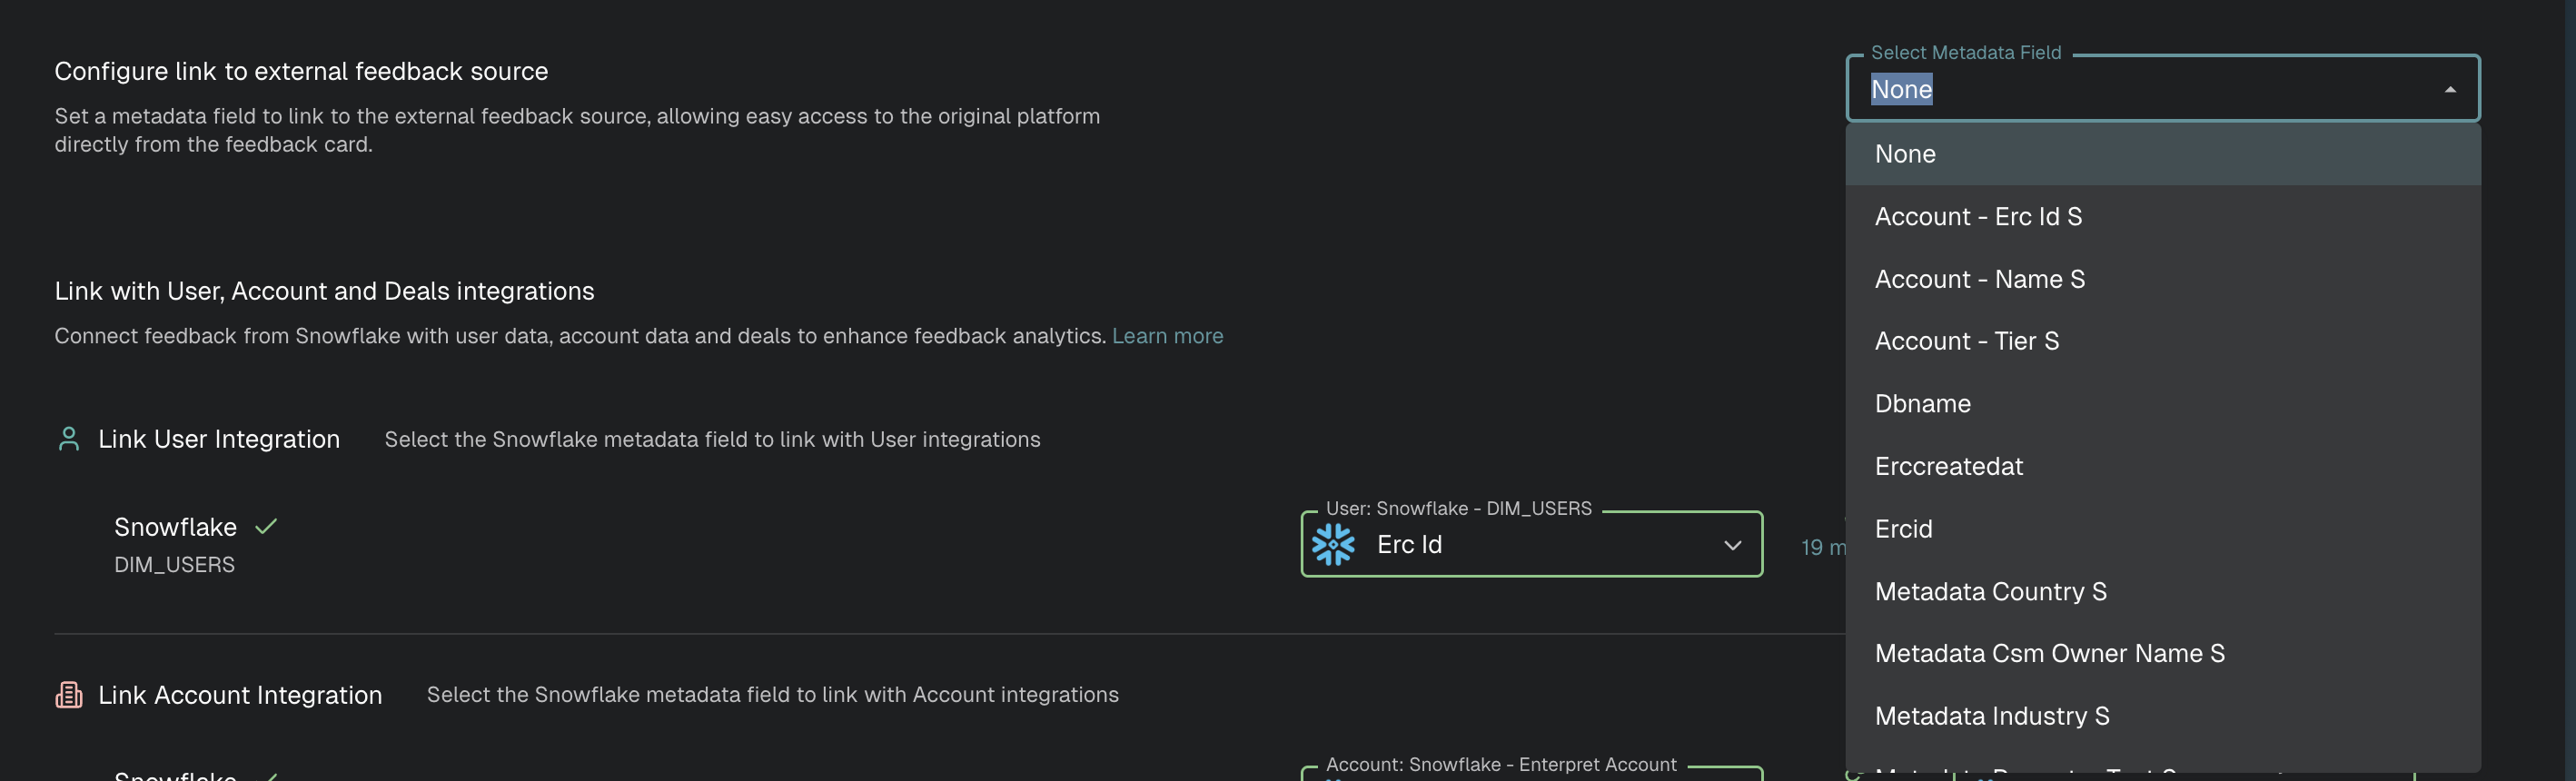
Once set, the metadata field displays on the Go to source icon link on feedback cards.
Account attributes: visibility, removal, and access
Hiding an account attribute changes its display; it does not remove the stored value or create a field-level security rule. Before syncing sensitive values such as exact ARR, confirm which account, query, MCP, or export surfaces the intended users can access. Use appropriate derived values, such as an ARR band, when exact values should not be shared.
Hiding a field changes its presentation. Removing a value from an account changes the stored account data. Restricting access would require a separate authorization control; the visibility setting does not provide one.
To remove an Accounts webhook attribute value, resend the same account identity with the complete set of attributes you want to keep and omit the unwanted attribute. This does not automatically remove the field definition or values on other accounts. If users should see ARR bands, calculate the band before syncing and send it instead of exact ARR. See Syncing Users and Accounts for update examples.