
Custom cohorts in Enterpret
In this article
In this article group
Can I analyze local data with Enterpret?
Start with Enterpret Agent for one-time analysis. Open a new Agent Session, select + → Attachments, add a supported local file, and describe the analysis you need. For example, ask the Agent to cluster responses, summarize themes, compare segments, or create a report. Follow the file formats and size limits shown by the uploader. See Getting Started with Enterpret Agent.
Use Agent Automations when the same analysis should run repeatedly. First confirm the prompt and output in a Session, then create an automation for the recurring report. An automation needs access to the data through your Enterpret workspace or an available connector; it does not automatically reuse a file attached to an earlier Session. See Scheduled Agent Automations.
Use Enterpret MCP when you want to work with Enterpret data from a supported external AI tool. The MCP connection gives that tool access to the Enterpret data and tools available to you. A local file remains handled by the external AI tool; Enterpret MCP is not a general-purpose file-upload API. See Enterpret MCP Server.
Use a custom cohort when your CSV is a list of identifiers that defines a segment, such as a set of opportunity IDs or account IDs. Cohort upload is for filtering and comparing the related feedback in Enterpret, rather than analyzing an arbitrary local file.
The new Cohorts feature allows you to upload a CSV file and create custom cohorts—ideal for use cases such as opportunity analysis, win-loss analysis, and more. This guide will walk you through the process of creating a custom cohort using our integrations page.
Step-by-Step Guide
1. Accessing the Cohorts Feature
Navigate to Integrations:
Go to the integrations page in your account.
Click on “New Integration”
Select Cohorts:
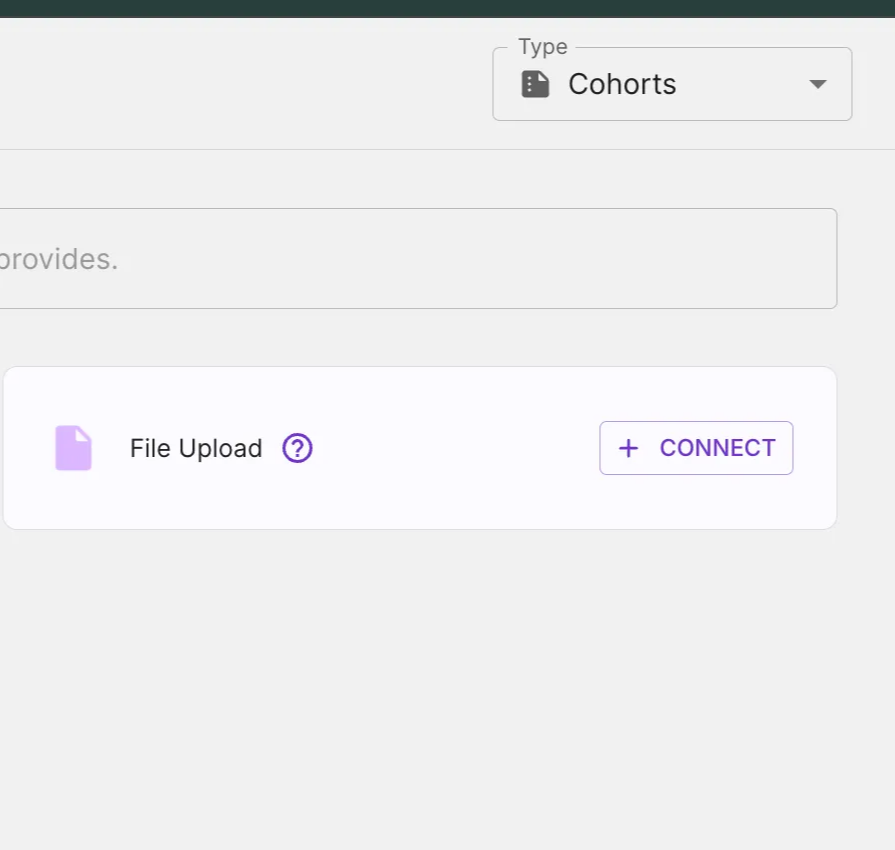
On the top right corner of the new integrations page, select the Cohorts option.
Click on “Connect” beside the File Upload option
2. Creating a Custom Cohort
Name Your Cohort:
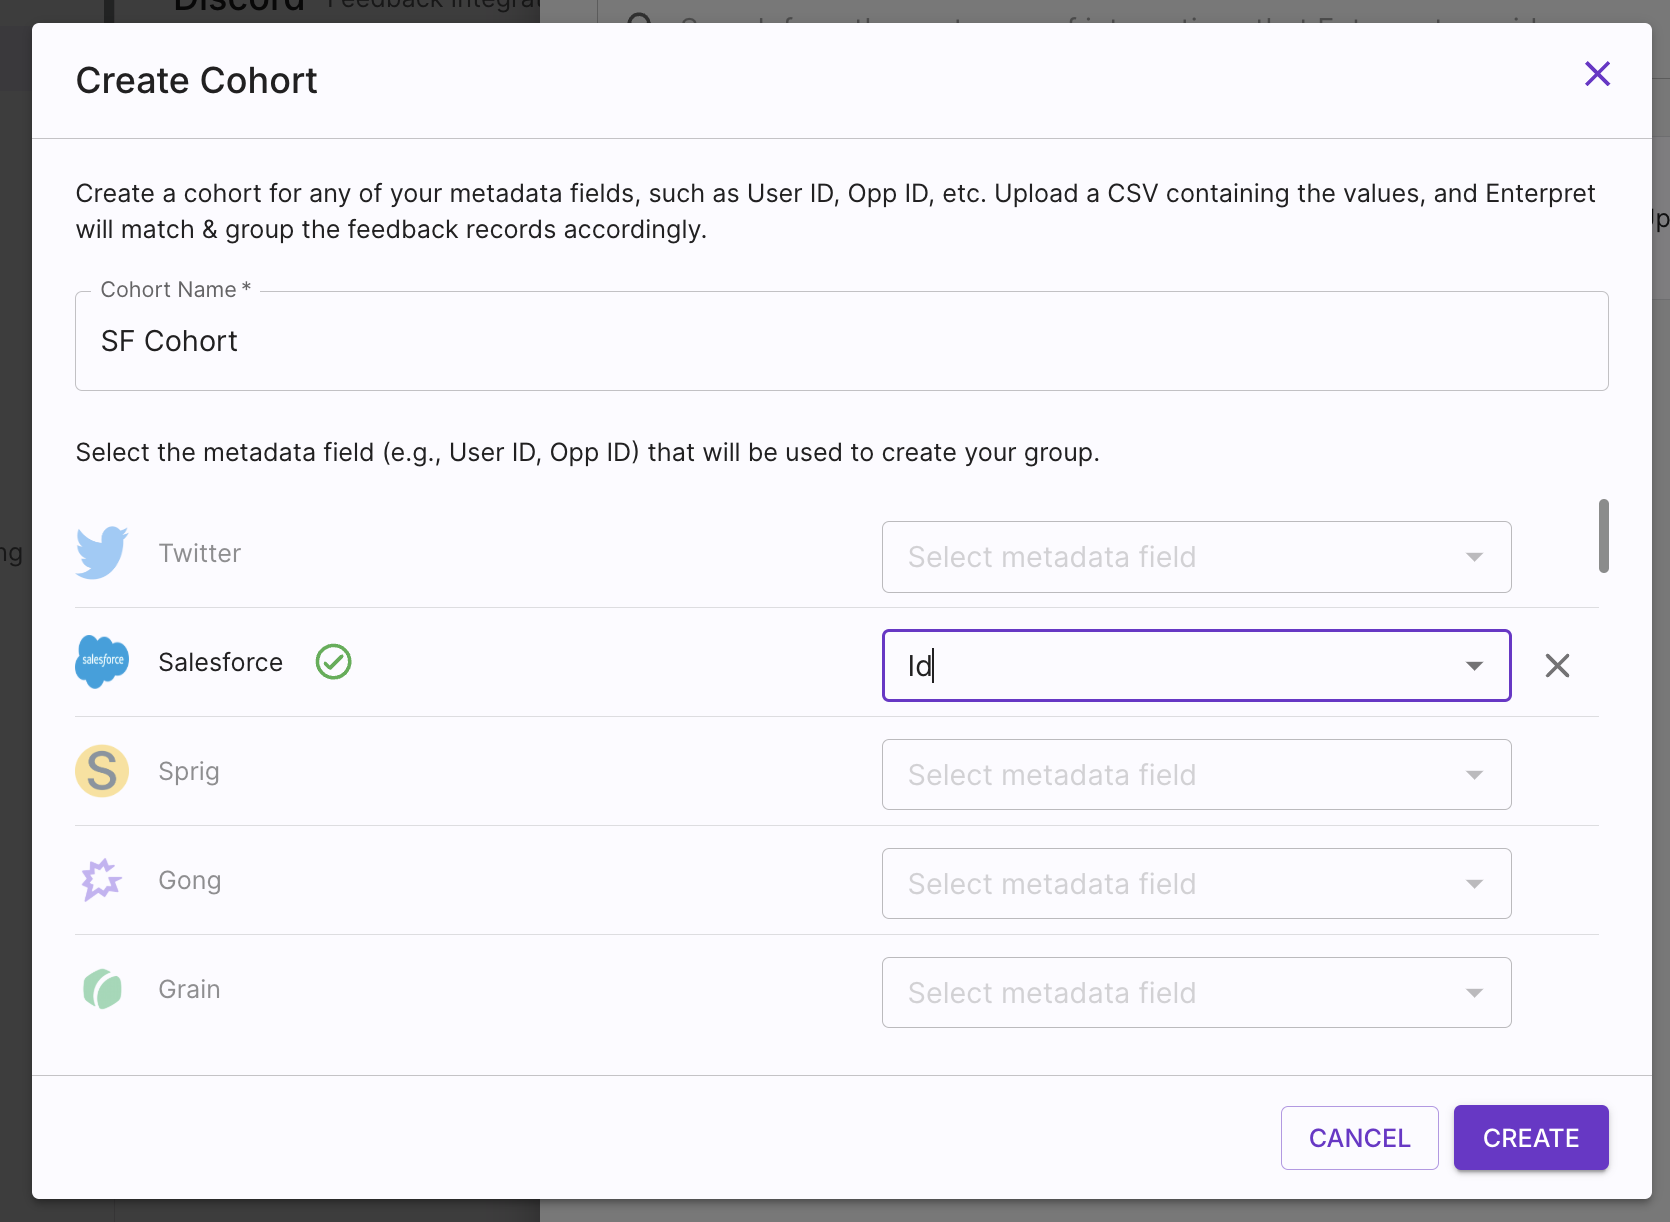
For example, if you’re creating a custom cohort for Salesforce opportunities, you can name it (e.g., “SF Opp Close Won”).
Select the Relevant Column:
Within your Salesforce integration, choose the appropriate field (such as an Opportunity ID) that you want to use as your cohort identifier.
Create the Cohort:
Click on Create. This action will redirect you to a confirmation screen stating that your custom cohort integration has been created.
3. Uploading Your CSV File
Specify Your File:
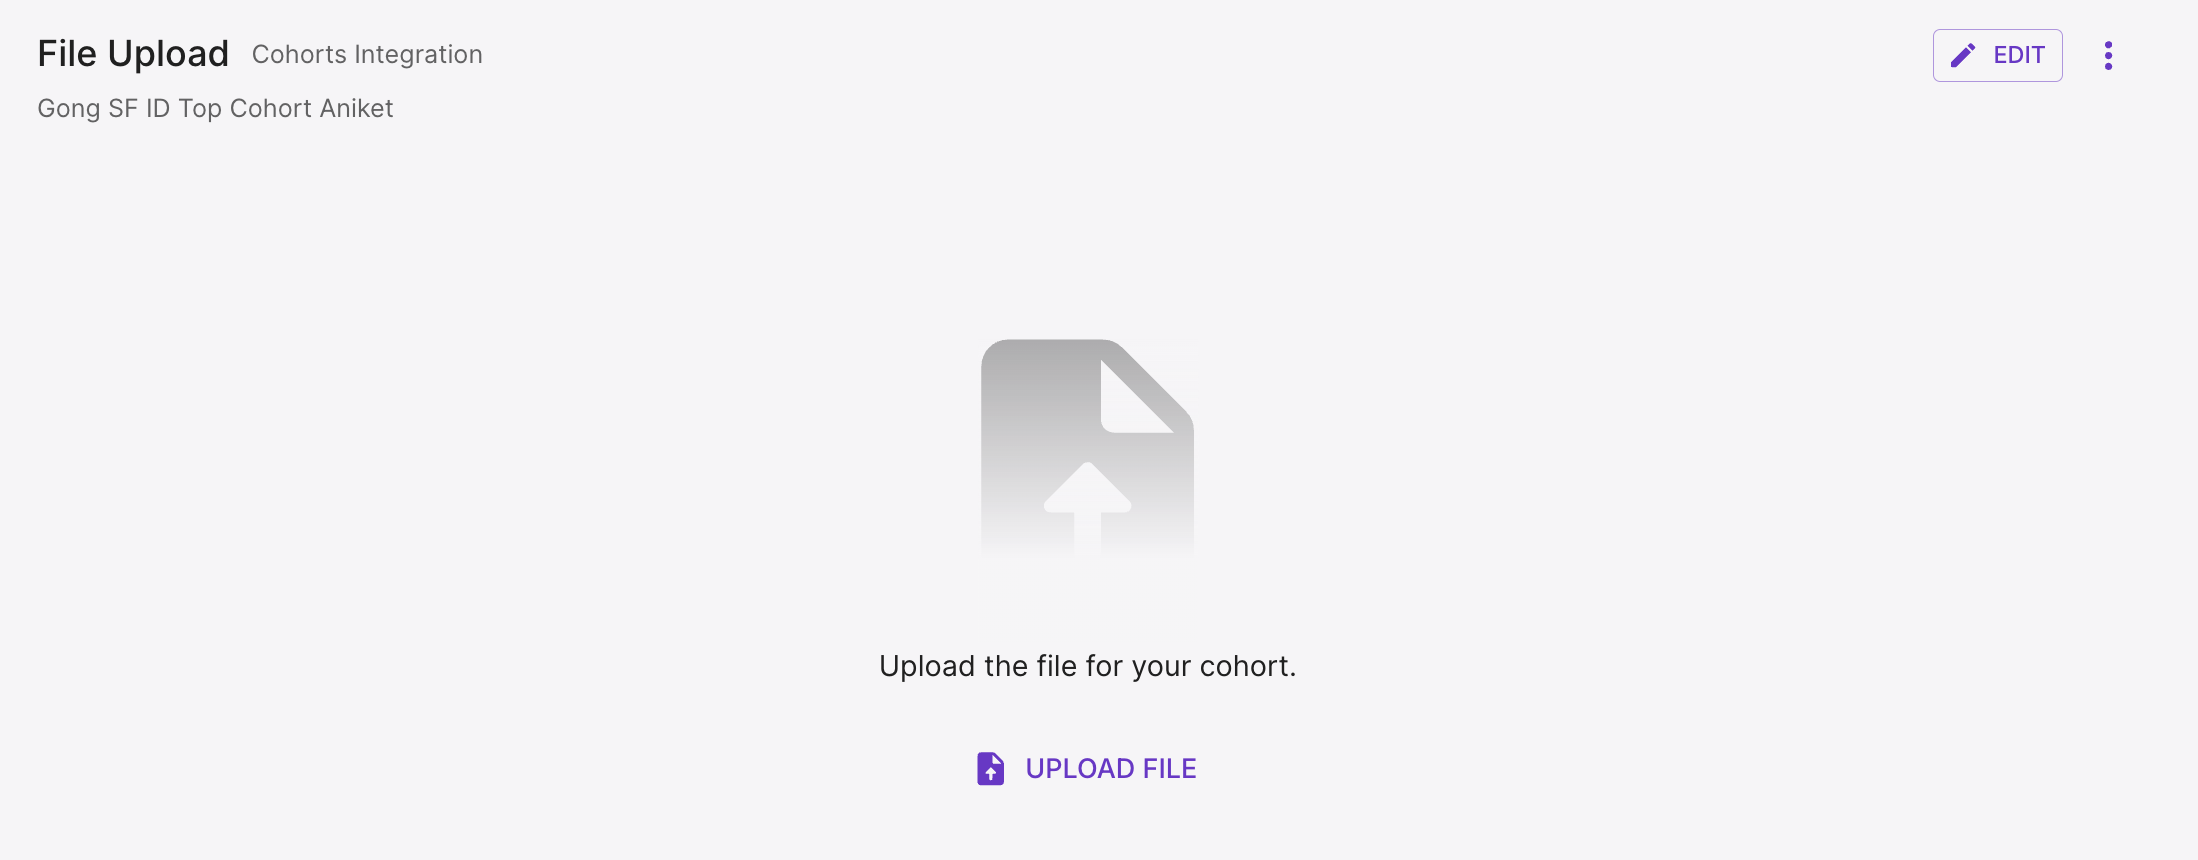
On the new screen, click on Upload File. Select the CSV file that contains your custom data.
Note : In the CSV file, please ensure to have only one column with no headers
Proceed with the Upload:
Once you have selected your file, click on Proceed. This will start the process of creating your cohort.
Note on Processing:
After you click Proceed, allow one to two hours for cohort processing. The upload screen may continue to show “Upload the file for your cohort” while processing completes.
Once cohort is available it shall be reflected in filters for feed or quantify
4. Viewing and Analyzing Your Cohort Data
Enterpret Agent (recommended): Once processing is complete, open a new Agent Session and ask the Agent to analyze feedback for the cohort. Include the cohort name, time period, comparison group, and output you need.
Agent Automations: If you need the same cohort analysis on a schedule, first test the request in a Session and then configure an automation with the same scope and delivery destination.
Feed and Quantify: Use these views when you need saved filters, record review, or chart controls for the processed cohort.
Quantify :
Once the cohort has been processed, you can view it by navigating to the Quantify page for further analysis.
Feed page :
On the Feed page, review specific feedback records related to your custom cohort and ask further questions to dive deeper into your data insights.
Troubleshooting and Support
Delayed Updates:
If you do not see your new cohort immediately after creation, please allow one to two hours for it to process. Once processed, it will appear in the cohort list.
Need Assistance?
For any issues or questions related to creating or analysing your custom cohort, please reach out directly to our product manager for additional guidance.
Processing status:
Cohort creation can take one to two hours. If the cohort is still unavailable after processing, contact your Enterpret team.
Use this context in Enterpret Agent reporting
Ask Enterpret Agent to use the relevant fields, customer attributes, or taxonomy conditions available in your workspace, with an explicit source scope and reporting period. For a daily report, weekly digest, or recurring summary, configure scheduled Agent automations with the same brief and verify the actual scope and output. Use connectors separately when a task needs external context or supported actions; data configuration here does not grant connector access.